

Oyakodon
Japanese Chicken & Egg Rice Bowl
Share this Recipe
This recipe for Oyakodon is brought to you in collaboration with BC Egg, who have financially compensated me to develop it.
All opinions are my own.
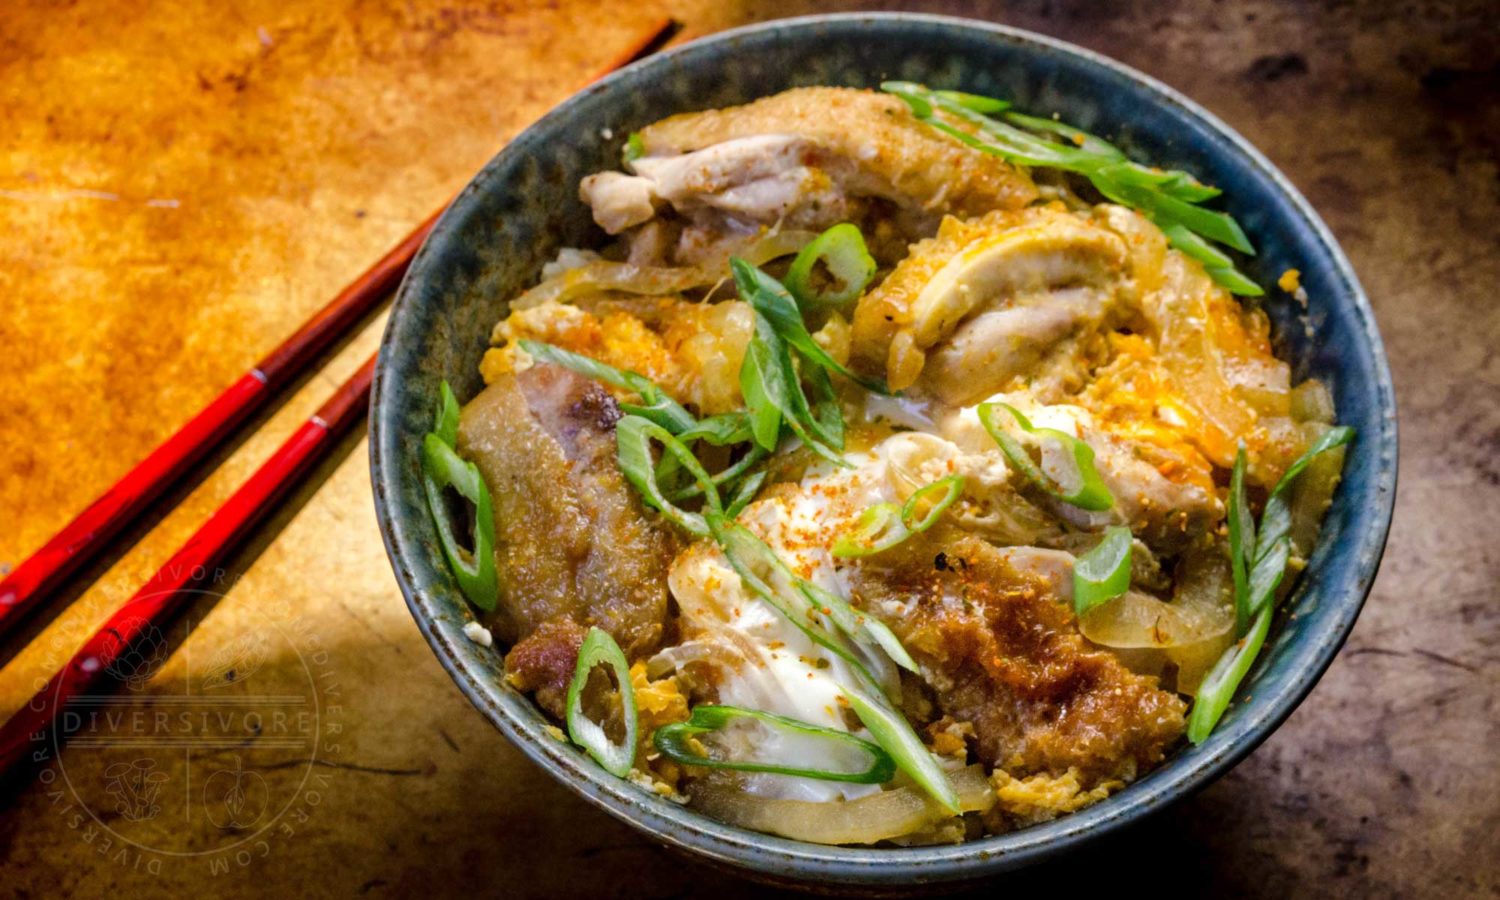
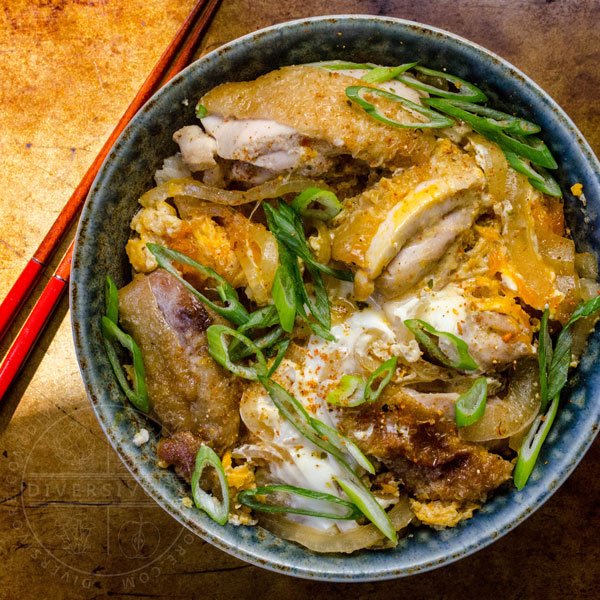
Oyakodon - literally "parent and child (rice) bowl" - is a simple, much-loved Japanese dish made with chicken, egg, and onions, simmered in a sweet dashi sauce, and served over rice. So simple. So good.
I love a recipe with a good name, and oyakodon certainly fits that bill. Most donburi recipes names are simple, descriptive affairs; for example, gyudon, butadon, and tendon translate to beef, pork, and tempura donburi respectively. But the perennial favourite dish known as oyakodon is something of an exception. Oyakodon (親子丼) means parent and child donburi (rice bowl) - a slightly macabre tongue-in-cheek play on the fact that the recipe is made with both chicken and eggs. There are a few other dishes that riff off of this joke too, much to my delight. Tanindon (他人丼), literally 'stranger' donburi, is made with eggs and beef or pork. Sake oyakodon (鮭親子丼) - salmon 'parent and child' donburi - uses cooked salmon and ikura (salmon roe). In the Kansai region, you might come across donburi made with duck meat and eggs called itokodon (いとこ丼) - 'cousin' donburi. I really hope that there are more of these out there.
As I mentioned in another recipe here on the site, donburi exploded into prominence in the late 19th and early 20th centuries. They were filling, quick, portable meals - perfect for a rapidly expanding and modernizing workforce. And oyakodon has long been one of the most popular recipes of the bunch. It's easy to see why - the ingredients are simple, accessible, and easy to work with, while the finished dish is richly flavoured and nutritious.
Oyakodon is a fantastic recipe for learning some of the fundamentals of Japanese cooking. It's easy to make decent oyakodon, but really great oyakodon comes with a bit of attention to the details and the ingredients. If you're new to the recipe, or to Japanese cooking in general, I highly recommend checking out the Recipe Notes below. There are a number of little tricks, tips, and variations to be aware of, as well as some information about making and using good dashi. If you're looking for a question and you can't find the answer, or you want clarification, hit me up in the comments at the bottom of the post!
Recipe Notes
There are a lot of oyakodon recipes on the internet, as everyone has their own preferred little variations. It's a very customizable recipe, and you really only need a recipe as a jumping off point. But in order to really make great oyakodon, it helps to understand how the various components work together, and how you can go about adjusting them (should you desire to do so).
The sections below will cover a few fundamentals and a few variations for you to consider. While I think it's worth reading through carefully, I will say that I think the two most important factors are making the dashi mixture and cooking the eggs. I would also encourage you to check out the notes on serving sizes, as this is one of those recipes that takes a bit of planning if you want to scale it up or down considerably.
Basic Dashi
Getting the sweet/salty/savoury balance right on the dashi mixture is, arguably, the most important part of this recipe. This sauce/stock is going to flavour the onions, eggs, chicken, and rice, so you want to make sure you're happy with it before you go too far.
I've got an extensive guide to making dashi coming soon on the site, but in the meantime I'll cover a few basics here. Given that you're adding shoyu, mirin, and sugar, the exact makeup of your dashi base isn't all that important, as long as you like the taste. I like a stronger, more savoury flavour here, so I make a small batch of fairly concentrated dashi with about 3/4 cup of water, a 4-5 inch (10-13 cm) piece of kombu, a small handful of katsuobushi, and a dried shiitake mushroom. Put the kombu in the water and bring it to a near boil, then turn off the heat and add the other ingredients. Let this sit for at least 30 minutes, then strain the mixture and you've got dashi.
If you don't have the ingredient for making dashi, you can use an instant dashi (especially if you have a brand you already like). These tend to be stronger than the scratch-made stuff anyway, so don't over-concentrate the broth. It is, however, very important to note that instant dashi often contains quite a bit of added salt, whereas scratch-made dashi contains none. If you use it, I would suggest decreasing the amount of shoyu (soy sauce) you use, then adjusting carefully to taste.
No dashi at all? Use an equal quantity of low-sodium chicken or vegetable stock. It's not a one-to-one substitution, but it will do the job.
Flavouring the Dashi Mix
Taste test your dashi. There's a good chance that you'll find it a little plain. Without added salt, the savoury/umami character of dashi can seem rather flat. Don't worry though - when you add salt and sweetness, the flavour really comes alive. This is why taste-testing your finished dashi mixture (i.e. with shoyu, sugar, and mirin added) is so important.
The quantities I've given in the recipe are, of course, my own preference. You might want a bit more salt, or a bit more sweetness. Feel free to adjust accordingly. But do keep in mind two important factors:
- The saltiness of the dashi mixture will be diluted when it's added to all of the other ingredients, so keep this in mind when adjusting to taste.
- Cooked onions are naturally quite sweet, so you want to avoid overdoing the sugar in the mixture.
If you feel like your mixture is salty enough, but still tastes a little one-dimensional, you might need a more concentrated and/or glutamate-rich dashi. I found that adding the dried shiitake mushroom really helped make this version stand out from previous attempts, for example.
Chicken
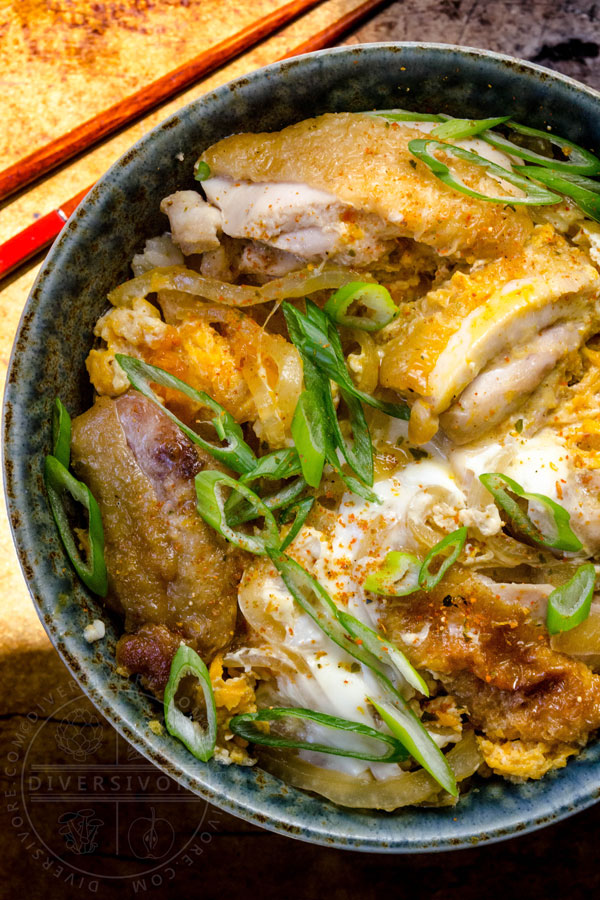
Chicken thighs are absolutely the go-to cut for this kind of recipe. They're flavourful, easy to work with, and they stay moist after cooking. You can use breast if you're so inclined, but be careful not to overcook it.
Skinless chicken thighs are probably more commonly used to make oyakodon, but I really like the extra flavour, texture, and colour you get with skin-on thighs. As an added bonus, using the same pan to sear the chicken and simmer the dashi and onions adds another punch of flavour.
When you sear the chicken you're not looking to cook it all the way through; once the skin is nicely browned, remove the chicken from the pan and slice it into bite-sized pieces. It will finish cooking in the dashi mixture later. It's worth noting that the chicken skin won't stay crispy in the finished dish, as it will soak in the dashi. It's much more about the flavour than the texture. That being said, if you want to garnish with some extra crispy chicken skin bits (which, hey, sounds awesome), just set some aside for the final plating.
Perfect Eggs
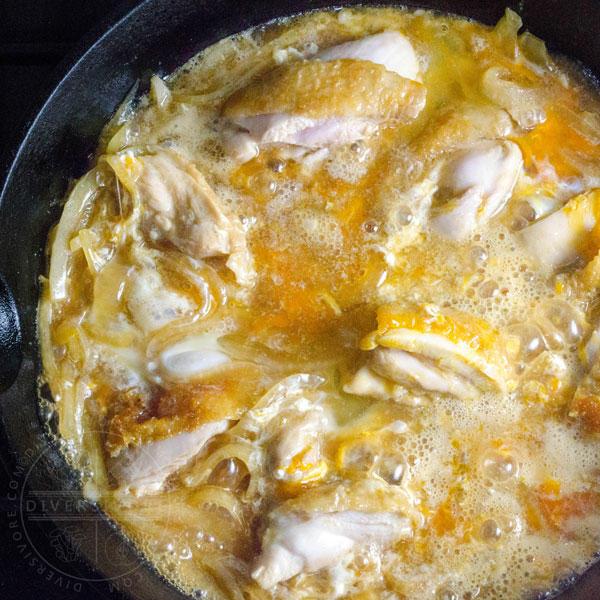
I don't normally like to include a lot of process shots, because trying to be a photographer while I'm cooking and making notes makes me want to tear my hair out. I've made an exception here and included one picture (above) to go with this section so that we can talk about how to really get perfect eggs for your oyakodon.
There are (in my opinion), two main keys to getting the egg component just right. The first is to avoid over-mixing. Crack the eggs in a bowl, break the yolks, and give everything a few stirs. The idea is to get a streaky yolk and white, rather than a homogeneous mixture. You can see in the picture above that large sections of unmixed yolk are still present. The second is to avoid over-cooking. The image above shows the eggs a few seconds after they've been added to the hot pan. Ensure that the chicken is cooked through right before this point, because the eggs will be done very quickly. Cover the pan and simmer for about a minute, then check the eggs. They should be set, but just barely. You want them to be very soft and jiggly. Remember that the heat of the chicken and the rice will further set the eggs, so don't be afraid to err on the softer side.
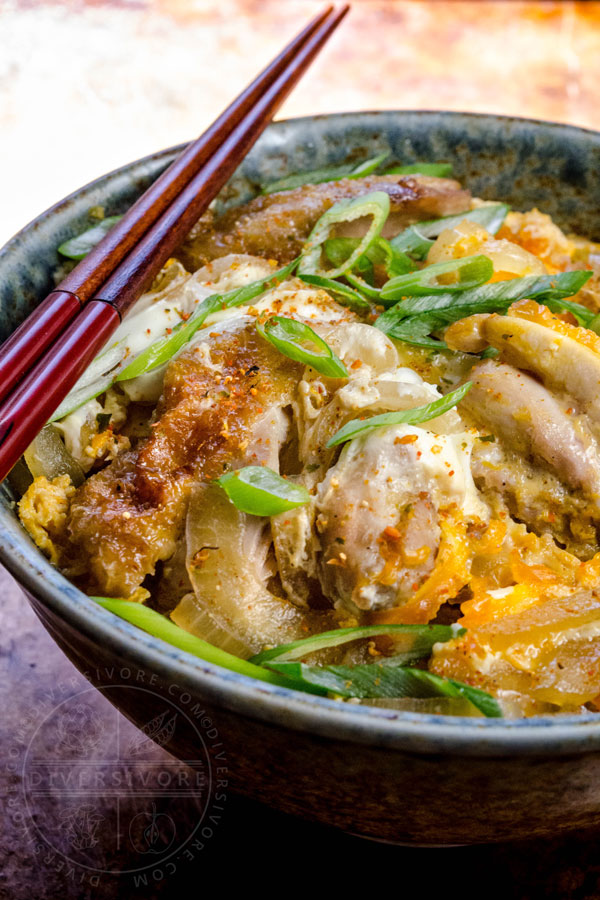
Scallions & Mitsuba
I used scallions in my recipe for two reasons: 1) I like 'em, and 2) fresh mitsuba is pretty tough to come by here.
Mitsuba, for the uninitiated, is an herb that somewhat resembles flat leaf parsley. The taste is somewhat like parsley mixed with celery (all three plants are closely related). If you can't get mitsuba and you don't want to use scallions, I'd suggest parsley, or a mix of parsley and celery leaves. The latter is a great way to use up those celery leaves that get forgotten about all too often!
Scallions (green onions) are a wonderful choice too. If you're worried that there'll be too much onion in the recipe, you needn't be; the cooked onions are quite sweet, and will have lost their raw onion 'bite.' I primarily use the green portions of the scallions, but you can thinly slice the white portions too.
Serving Size
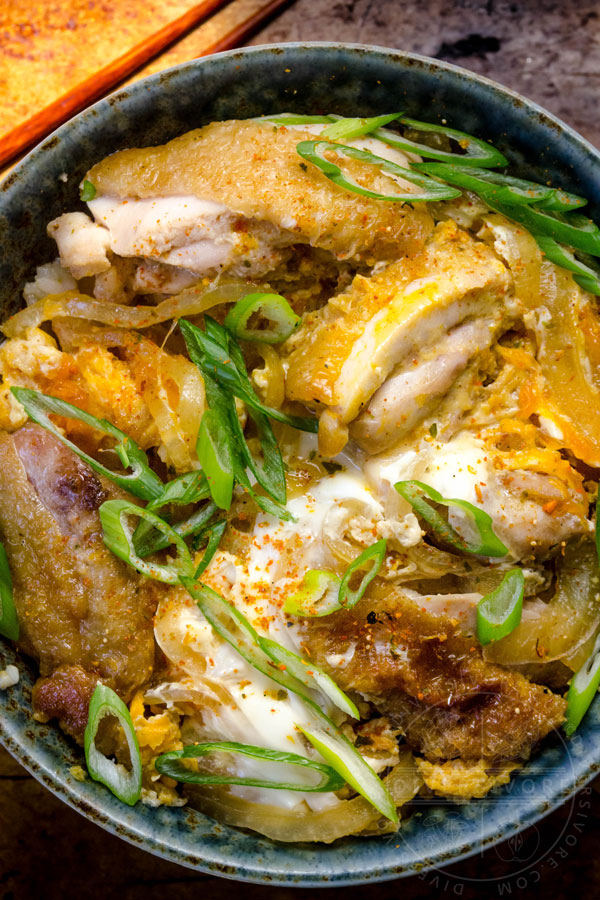
Scaling your oyakodon serving size up or down can be a little bit tricky. This hasn't got anything to do with the ingredients (all of which scale quite easily), but with the preparation of the eggs and chicken. Ideally, you want to just slide the cooked mixture out of the pan and onto the rice. This is made a little more complicated if you want to serve 3 or 4 people. That being said, the issue is more cosmetic than anything; you can always scoop individual portions from the pan and serve over rice, but the egg tends to break up and fall apart in the process. It will all taste the same, but it is harder to get that nice, uniform eggy layer on top of your rice this way.
The recipe as given makes one very large bowl that I would consider to be two servings. If you want to plate two separate servings, you can (with a little bit of care) transfer it to two bowls without too much fuss. This is definitely easier if you have a skillet with sloping edges.
Unlike many meals, oyakodon scales very nicely to a single serving size.
Vegetarian Option
For a super-simple vegetarian dish, simply omit the chicken and add an extra egg. This is sometimes called tamagodon (egg donburi), and it's delicious. But in keeping with the oyakodon naming cleverness, I think we should call it minashigodon (孤児丼) - or 'orphan donburi.'
Note: Nutritional Information is given for a single bowl, with 1 cup (200 g) cooked rice - however, this is a very large serving of food. One bowl can comfortably serve two people (or one very, very hungry person).
Nutritional Summary
It's also worth keeping an eye on the sodium in your ingredients. Different brands of soy sauce and mirin can have rather different amounts of added salt. Scratch-made dashi has virtually no salt, while instant dashi often has lots. Check what you're working with, and adjust the amount of soy sauce you add accordingly. You can substitute a low-sodium soy sauce if needed.
Ingredient Pages
No ingredient pages have been written yet for any of the ingredients in this recipe. Like to see one? Let me know in the comments below or by email.
Pantry Pages
Kombu (in Dashi)
Katsuobushi (in Dashi)
Mirin
Shichimi Togarashi


Oyakodon
Ingredients
- 2 boneless skin-on chicken thighs
- 1/2 cup dashi (see note)
- 2 tbsp mirin or sake plus 1/2 tsp of sugar
- 2 tbsp shoyu (soy sauce)
- 1 tsp sugar
- 2 large eggs
- 1 small onion sliced
- 1 scallion thinly sliced
- shichimi togarashi to garnish
- cooked rice to serve
Instructions
- Crack eggs into a bowl. Break yolks and mix a little, but leave the yolk and white streaky and separate.
- Combine dashi, mirin, shoyu, and sugar. Stir well to combine.
- Sear chicken, skin side down. Remove the pan from the heat. Slice the chicken and set it aside (note that it should not be cooked through at this point).
- Place the pan back over medium heat. Add the onions and dashi mixture. Bring to a simmer, cook for 1 minute.
- Add chicken, skin side up. Simmer until chicken is cooked through and the onions are soft and translucent (about 3-4 minutes).
- Pour the eggs into the pan and stir once or twice to distribute everything evenly. Cover, and cook until the egg is barely set (about 1 minute).
- Transfer mixture to a hot bowl of cooked rice. Garnish with mitsuba/scallions and shichimi togarashi and serve immediately.
Notes
Nutrition
More Japanese Recipes
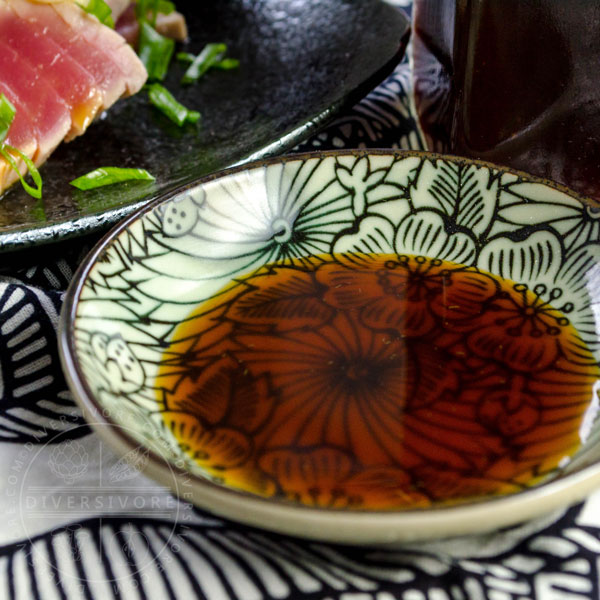
Ponzu Shoyu
Kitsune Nabe
Tenshindon
Share this Recipe
Comments
I’ve never made Japanese at home – too intimidating for this simple home cooker. 🙂 But this actually looks doable and not to mention delicious. I love all of these flavours! Do you use oil in the pan when searing the chicken?
It’s a great recipe for learning about Japanese cooking! I think Japanese home cooking seems a lot more intimidating than it really is to a lot of Western cooks. I used a tiny bit of oil in the pan to sear the chicken, but it tends to render fat so fast that you really don’t need much. In a truly non-stick pan I think you wouldn’t need any.
This sounds so good…I would eat it for breakfast if it was in front of me now. You know, I’ve never made dashi. It’s something I’ve always meant to try as it’s such a huge part of Japanese cooking. Maybe it’s because I know it will lead to a giant rabbit hole…
Thanks Bernice! Dashi is one of those things that holds a lot of people back from Japanese cooking, but once you’ve tried it you see that it’s really quite easy. And yes, definitely a rabbit hole… but a tasty one!
I’ve never had Japanese food before, but this looks so delicious. I love the play on words since it has both chicken and egg in the dish. The flavours in this dish are wonderful!
Love Oyakodon! Thanks for your tips on making the dashi – it’s so crucial for get that perfect ratio 🙂
Pinned to make later!
My pleasure! I love working with (and writing about) dashi, so I’m glad it was helpful!
Sean, I love reading your posts. They are always filled with so much information that the average person needs to know when preparing a dish like Oyakodon. This is on my bucket list to try this weekend.
Thank you so much Amy! I hope it works well for you.
I’m really getting into Japanese food and cooking and can’t wait to try this! I’m also always looking for great egg recipes!!
Glad to hear it Terri! It’s a really wonderful cuisine to get into, and there are so many options. Cheers!