
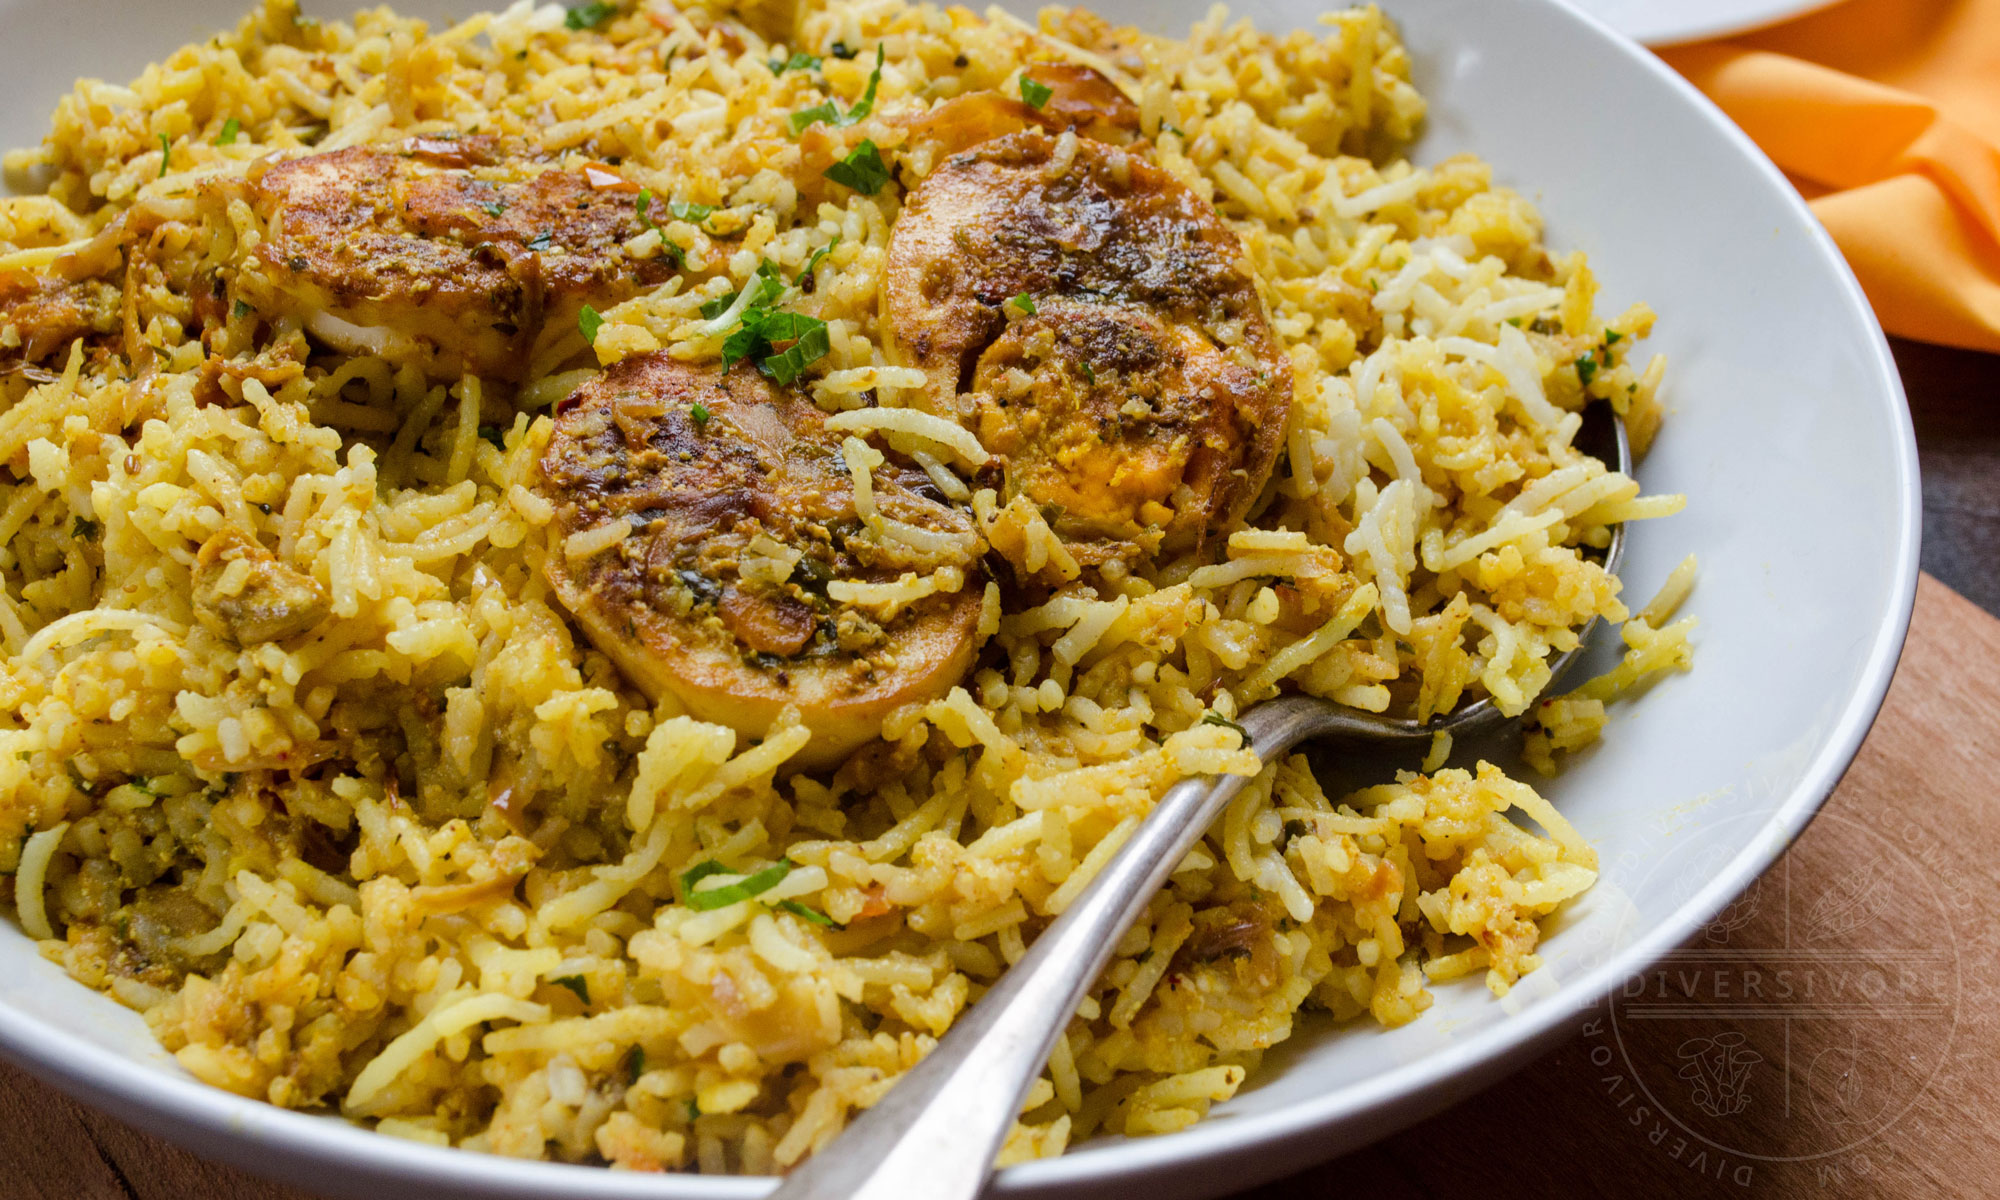
Egg Biryani
Hyderabadi Style
Share this Recipe
This recipe for Hyderabadi Egg Biryani is brought to you in collaboration with BC Egg, who have financially compensated me to develop it.
All opinions are my own.
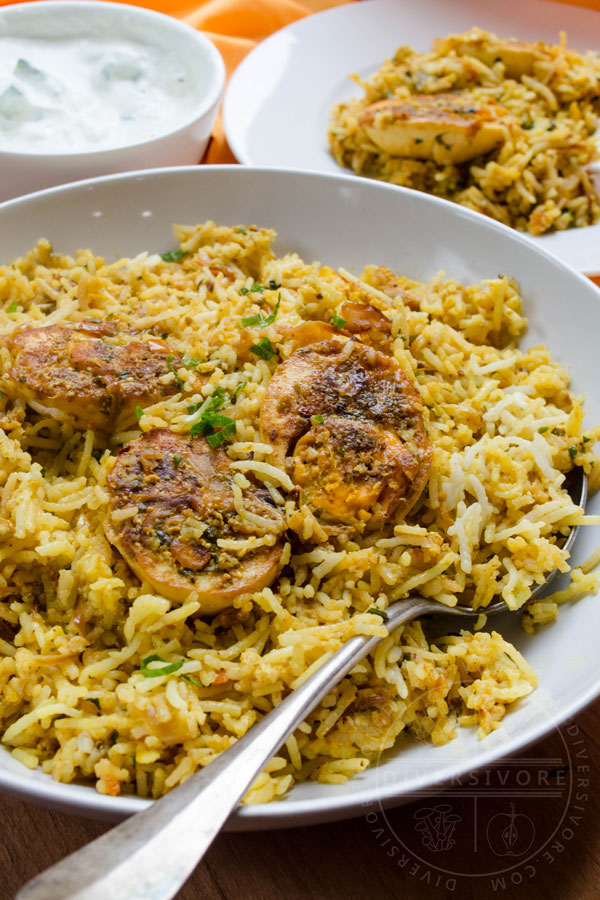
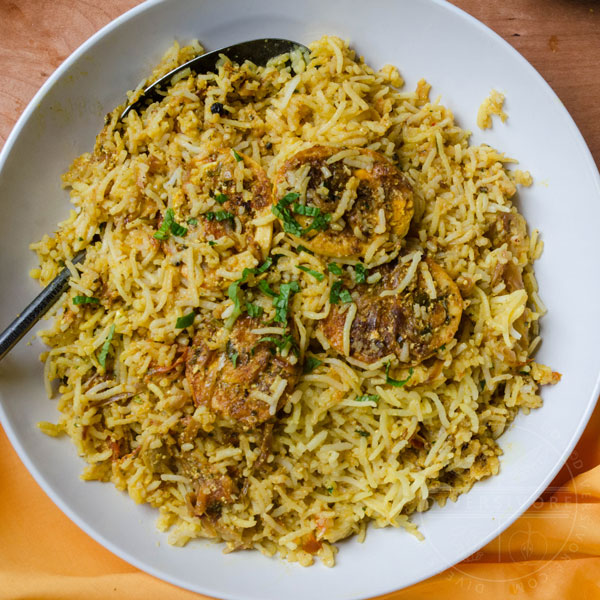
With saffron, fried onions, a variety of spices, and aged basmati, egg biryani is a beautiful and elegant treat from the rich and flavourful culinary traditions of Hyderabad. While this dish is a bit complex to organize, it's not all that difficult to make - just make sure to read through thoroughly (especially if you're new to making biryani, or to dum cooking) before you get started!
More and more South Asian restaurants outside of the subcontinent are branching out and exploring regional cuisine, rather than falling back on the Anglo-Indian standards that have dominated for decades. Likewise, more and more English-language Indian food writers are sharing the cuisines that they've grown up with. This has led to more home cooks exploring the diversity of Indian cuisine - and my goodness is there ever a lot of diversity to explore. But while I'm definitely enjoying this shift, my own interest in South Asian culture (and subsequently, South Asian cooking) didn't start with food at all, but with postage stamps. Yes, I collect stamps, because I am a very cool person with very modern hobbies.
When I was a young boy, my grandfather gave me his childhood stamp collection. The collection was surprisingly diverse and far-reaching; my grandfather's uncle was a merchant seaman who travelled the world, frequently sending stamps home to England as souvenirs. I was instantly fascinated by these little pieces of paper. They appealed to my inherent passion for categorizing and collecting, and I loved the intricate artistry of the tiny engraved images. But what really drew me in was the mystery - and the history - behind each stamp. This little book was full of places I'd never heard of, and languages I couldn't read. There were people on these stamps that I didn't know, and countries that no longer existed. Each tiny stamp told a story, and I wanted to know them all.
I started hunting for old stamps and new stories, and by the time I was in my twenties my collection had grown enormously. History was always the driving factor behind my new acquisitions, and over the years I became increasingly fascinated with the tumultuous history of the Indian subcontinent.
The first postage stamps issued for use in what we now call India came out in 1854.1 In 1971, Bangladesh declared independence from Pakistan, and the map of the Indian subcontinent more-or-less arrived at its current state. The intervening 115 years were very, very politically complicated - a fact that's reflected by the stamps in the region. The British Raj handled much of the early postal administration in the region, but there were a number of states that remained partially self-governing. Forty-one states chose to issue their own stamps, while a further six entered into postal conventions that allowed them to use overprinted stamps of British India. I acquired stamps from many Indian states over the years, but I quickly became fascinated by small, ornately designed stamps of the state of Hyderabad, in the heart of India's Deccan Plateau.
- A prepaid wax seal 'stamp' was actually issued in 1852 for use in the Scinde Dawk postal system of present-day Pakistan, but this is generally considered to be a stamp forerunner, rather than a true postage stamp.

The two anna stamp above was issued between 1908-1911, and is a perfect demonstration of the factors that piqued my curiosity all those years ago. Look carefully at the writing on the stamp and you'll notice a remarkable four different languages on the value inscription around the central medallion. Clockwise from the top left, they are Marathi,2 Telugu, Urdu, and English, all surrounding the ornate seal of the Nizam of Hyderabad.3
The multilingual stamps of Hyderabad reflect the region's status as a geographic and cultural nexus in India, deeply influenced by various sociocultural groups. At the turn of the 20th century, the population of Hyderabad was majority Hindu, but the ruling Nizams were Muslims whose ancestry could be traced back to the Mughal Empire. The Hindu population was further separated into Telugu- and Marathi-speaking peoples. Urdu was used by the majority of the Muslim population, while Persian (written in the same Perso-Arabic script) was also learned by to the aristocracy and upper-class. English was featured thanks to it's increasing use as a lingua franca in South Asia (which was, of course, directly connected to British rule). The stamps of Hyderabad were clearly meant to be easily understood and used by the many residents of the state, regardless of their cultural background.
2. This is sometimes mistakenly identified as Hindi. The two languages do use the same Devanagari script and are similar, but not entirely mutually intelligible.
3. Interestingly, the word Hyderabad is nowhere to be found on most of the state's stamps; the bottom Urdu inscription (نشان ٹپہ جانا - Nishān Ṭappah Khānā) translates to "symbol of post office."
The region that was Hyderabad state is now divided into three states (Telangana, and portions of Karnataka and Maharashtra), but Hyderabad city, now the capital of Telangana, remains deeply reflective of the regions' complex cultural history. This is reflected in language of course, but also in the unique cuisine of the region. The food culture of the Deccan plateau region was shaped over centuries of rule by Hindu dynasties and Islamic sultanates. The former formed the basis of what is commonly considered the indigenous cuisine of the region, while the latter introduced numerous Turkish, Arabian, and Persian elements. When the Nizams came to rule the region in the 18th century, they brought with them many elements of Northern Mughlai cuisine. The south of India continued to influence the region however, with coconut, tamarind, and fiery red chilies featuring prominently.3 The impact of Islamic rule is reflected in the numerous meat dishes found in Hyderabad, including the much-loved Hyderabadi Biryani made with goat meat. Today, Hyderabad is the most meat-loving city in India, and the population of Telangana state is 99% meat-eating. Still, the majority Hindu population has shaped Hyderabadi food in a big way, and it's easy to find many fantastic meat-free dishes. In fact, PETA declared Hyderabad the most vegan-friendly city in India. How's that for contrast?
I would never claim that egg biryani stands in for the totality of Hyderabadi cuisine, but it does serve as a fantastic example of what makes the region's cuisine so special. It's also a wonderfully hearty and filling vegetarian recipe. With fragrant basmati, a wealth of diverse spices reflecting multiple cultural influences, plenty of golden brown fried onions (birista), and filling, flavourful eggs, you won't miss the meat at all. I don't actually know whether egg biryani was first created as a vegetarian alternative to the meatier biryanis or if it simply stood on its own merits, but we're lucky to have it in either case.
Hyderabadi egg biryani is a fantastic dish, and while it takes a bit of organization and preparation (more on that below), it's not all that difficult to make. I hope you enjoy it, and I hope it acts as a delicious gateway to Hyderabad's rich and deeply creative food culture.
Sometimes, a recipe is just like an antique postage stamp - a story of culture and history hiding in plain sight. Whether it's four languages on a scrap of paper, or an ethereal rice dish that tastes like nothing you've ever tried, some things just beg to be explored.
3. Chilies are native to the New World, and were actually introduced to Goa by the Portuguese in the 15th century. Their popularity grew quickly in the south, and then throughout the Indian subcontinent.
Recipe Notes
Organization is absolutely key to this recipe (and, I would argue, to making biryani in general). There are a lot of ingredients, a lot of components coming together, and a number of steps that you want to get in the right order. None of the cooking steps or techniques are inherently difficult, but it's quite easy to accidentally omit a step or mess up the timing if you don't have a good sense of what you're going to do. I've done my best to make the recipe card self-explanatory, but I strongly suggest that you read through the Recipe Notes below if it's your first time making this biryani (or biryani in general).
As I often do with more complex recipes, I've broken this section up into two subsections. The first section looks at the ingredients, including variations and substitutions, while the second covers techniques.
Ingredient Notes
Much of this section will be familiar to anyone with a lot of experience with Indian cooking, but I want to be sure to provide a little extra information for anyone who's a little bit newer to the topic. Wherever possible, I've given, English, Hindi, and Telugu names for important ingredients. Telugu and Urdu are the official native languages of Hyderabad, but Hindi names are frequently more useful for tracking down ingredients in Indian grocery stores (at least in North America). I've given tips for sourcing ingredients and for making substitutions (or variations) where I can. If you find yourself with a question about an ingredient, let me know in the comments below!
Basmati Rice
Rice is one of those ingredients that seems simple enough, but is actually staggeringly diverse when you really get into it. Consequently, the choice of which variety to use in a given recipe can be pretty important. White basmati rice (a fragrant long-grain variety) is the go-to variety for biryani, as well as similar dishes like pulao. Simple enough? Well, we're not quite done yet - we need to talk about age. Biryani is a special dish, and most people will recommend using high-quality aged basmati (as opposed to un-aged 'young' basmati) to make it. Aged basmati rice (वृद्ध बासमती चावल in Hindi, పాత బాస్మతి రైస్ in Telugu) is exactly what it sounds like - basmati rice that's been aged, generally for at least two years. The uncooked grains should be long, thin, slightly tapered, and a pale golden/yellow colour.
Aged basmati is more expensive than young basmati - often double or triple the price of the cheaper stuff. But the price is worth it when it comes to biryani. Aged basmati is said to taste better, and (perhaps more importantly) to absorb liquid more easily and evenly without allowing the grains to stick together. Sticky biryani is a big no-no, and aged basmati will help you achieve the nice, fluffy, evenly separated grains that you're looking for.
Well-stocked Indian and South Asian grocery stores are generally going to be the best place to look for aged basmati rice. The packaging will generally state (proudly!) the amount of time that the crop was aged, but if you're in doubt, looking for the smaller and more expensive bags. Basmati rice is commonly carried at many Western grocery stores (at least in Canada where I live), but it can be considerably harder to find aged rice unless your particular store caters to a large South Asian population.
You can still make egg biryani with unaged basmati if this is your only option, but if you have the means and opportunity to use the aged stuff, I suggest going for it. Biryani is a special meal, after all.
Saffron Milk
Saffron (केसर in Hindi, కుంకుమ in Telugu) is one of those ingredients makes a lot of home cooks anxious. It can be expensive, and it's fairly easy to misuse - but it also has an unmistakable and unique impact on the recipes that feature it.
Saffron plays two key roles in biryani: colour, and flavour. The colour part is fairly self explanatory, as the saffron-infused milk lends a lovely yellow tint to the rice (further amplified by the turmeric used in the gravy). But the flavour is important too! If anyone tells you that saffron only adds colour, they're probably using very old (or very bad) saffron. Saffron has a distinctive floral/grassy character with a prominent iodine component. It's worth noting that a little saffron goes a long way; I find that using too much saffron can really overemphasize the iodine, which can overpower a dish and make it taste medicinal.
Now, on to how to use the stuff! At its most basic level, saffron milk is just milk that's been allowed to infuse with saffron. Easy. In practice, you can do a couple of things to get more flavour out of the saffron. I like to wrap my saffron in a little piece of aluminum foil and toast it in a hot pan for 20-30 seconds before putting it in the milk. You can also grind or break up the saffron threads to help them infuse the milk a bit faster.
If you're able to, I suggest using saffron in your biryani. However, if you can't get any, or if you want to try your hand at making your own biryani before investing the time or money into finding good saffron, there are a couple of options. The first is to omit the saffron milk entirely. You may need to add a little more water (1/4 to 1/2 cup) to the gravy to make up for the moisture difference, but otherwise it's a pretty straightforward omission. If you don't want to miss out on the colour, however, you can make a bit of turmeric milk instead - simply infuse the milk with a generous pinch of turmeric powder in place of the saffron. It probably goes without saying, but I should note that this option really only replicates the colour; there's no substitute for the taste of saffron.
Ginger Garlic Paste
Ginger and garlic are so important to South Asian cooking that they're frequently combined into a ready-to-use paste. Ginger-garlic paste is a great ingredient to have on hand if you're going to need it regularly, but if you're worried about it going to waste you can just as easily prepare the ginger and garlic (separately or together) for use in this recipe. I use equal quantities of garlic and ginger (about 1 tbsp of each [ground] for this recipe), but if you've got particularly strong tasting ginger you might want to try a 2:1 ratio instead. In either case, simply peel both ingredients and crush/grind them in a mortar and pestle or spice grinder. For more on making your own ginger-garlic paste and on the ratios, I encourage you to check out this simple and handy little guide from Swasthi's Recipes.
Fried Onions
Birista, or crispy fried onions (बिरिस्ता in Hindi, బిరిస్టా in Telugu) are an essential component to virtually all biryanis. They're also really, really tasty. You can by ready-made birista at many Indian grocery stores and markets, but if you don't have a brand you already know and love, you might want to try making your own at home. I found this guide from Whisk Affair handy, as it covers pan-frying, deep-frying, and air-frying options. I won't repeat the whole process here, but it's fairly simple; slice your onions very thinly, then fry them until they're golden in a generous quantity of oil. You want your oil hot, but not so hot that the onions burn quickly. Do not attempt to salvage burnt onions, as they'll be very bitter and sour.
Some people like their birista very crunchy while others prefer them softer (i.e. retaining a bit more moisture). Feel free to experiment. I personally like the flavour of the softer ones a bit better, but the crispy ones are really good for garnishing. You can't go wrong, really.
Spices
This could easily be a longer section, but I want to keep things as concise as I can. There are lots of spices in this egg biryani recipe, though most should be easily found at any Indian/South Asian grocery store. If you're making your own biryani masala (I hope to have my recipe done soon) you may need to spend some extra time sourcing ingredients out. If your access to good spices is somewhat limited by your location, there are still good options you can try out in order to make a delicious biryani. After all, there's no single blend of spices that define this (or any) biryani recipe! You can adapt, omit, or add based on your own personal tastes.
Biryani Masala & Alternatives
Biryani masala is a spice blend used to make, you guessed it, biryani. I make my own, but you can also buy it in Indian grocery stores. Much like garam masala, biryani masala is a highly fragrant spice blend without much added heat. Biryani masala tends to be a bit 'sweeter' and milder, while garam masala leans a little heavier into the 'warming' spices like like cloves and black pepper.
Biryani masala recipes vary enormously, and a wide variety of spices can be included or excluded, so don't worry too much about getting it exactly 'right' if you're making your own. If you can't find biryani masala, try using garam masala mixed with a bit of extra cardamom, star anise, nutmeg, and cinnamon. Aim for a 2:1 ratio of garam masala and the added spices - or just trust your instincts.
Whole vs Ground Spices
If you peruse even a handful of Indian recipes, you'll quickly see that there tends to be a real mix of ground and whole spices used. Indeed, sometimes the same spice might be used in both formats in different parts of a dish! It can be difficult to figure out how to substitute one for the other, and I can't possibly list all the rules here, but I want to make three very broad notes:
- When making the rice, I recommend sticking with whole spices. If you're worried about picking out the spices after and/or getting a bit of a large piece of cardamom pod (etc.), try adding the spices to a small cheesecloth bag tied with a string.
- When making the gravy, you can switch up ground and whole spices if you feel comfortable doing so, but note that the difference in flavour can be marked at times. Many biryani gravies call for using a whole cinnamon stick, but I personally find that you get very little cinnamon flavour this way, so I use ground. That being said, I don't use the equivalent of an entire ground stick of cinnamon!
- If you can grind your own spices, do it. Freshly ground spices are nearly always more flavourful than pre-ground store-bought ones. I use a dedicated electric spice grinder, but a mortar and pestle or clean coffee grinder works wonderfully too. Do note though that if you grind a lot of spices you might want to keep a separate coffee grinder for you actual coffee beans!
Notes & Substitutions
Cinnamon (दालचीनी in Hindi, దాల్చిన చెక్క in Telugu) - If possible, I recommend using true cinnamon (Cinnamomum verum, often sold as Ceylon cinnamon), as opposed to cassia (Cinnamomum cassia). In some parts of the world (Australia, for example), the two ingredients are supposed to be labeled separately by law, but in many places cassia is frequently sold as cinnamon. Here in Canada, the vast majority of 'cinnamon' encountered in stores is actually cassia. If you have inexpensive powdered 'cinnamon' and you're not sure what type it is, there's a very good chance it's actually cassia. Now, cassia is a great ingredient, but it's not identical to true cinnamon. If you can't get true cinnamon, cassia will still work, but if you can get your hands on the real stuff, be sure to use it.
Indian Bay Leaves, or Tejpat (तेज पत्ता in Hindi, భారత బే ఆకు in Telugu) - Indian bay leaves and European bay leaves (bay laurel) are NOT the same thing, though they are frequently confused. Bay laurel (Laurus nobilis) is more common in Western kitchens, but Indian bay (Cinnamomum tamala) has an entirely different flavour profile, with more distinctive notes of cinnamon. Indian bay leaves are distinctively different looking too, with three distinct veins running the length of the leaf. The veins on bay laurel branch from a single central vein. Indian bay is easily found at Indian/South Asian grocery stores, but note that the English package labeling may only say 'bay leaves.' If you can't get Indian bay, don't substitute bay laurel. Instead, use a little more cinnamon and a little extra clove.
Kashmiri Chilies (कश्मीरी मिर्च in Hindi, కాశ్మీరీ మిరప in Telugu) - These medium sized, relatively mild (1000-2000 Scoville Heat Units - milder than a jalapeño) chilies are much loved in Indian and Pakistani cooking because of their complex flavour, bright colour, pleasant sweetness, and overall versatility. Kashmiri chili powder is fairly common in South Asian grocery stores, though whole chilies can be a bit harder to track down. If you can't find Kashmiri chilies (or good chili powder) but you have access to good Mexican ingredients, guajillo chilies make a surprisingly respectable substitute. You can also substitute a 4:1 mixture of sweet paprika and cayenne pepper (or a similar hot chili powder).
Dairy-Free Option - If you need or want to go dairy-free on this recipe, it's fairly simple to do. The easiest step is to substitute oil for ghee wherever it appears. A number of milk substitutes are possible for the saffron milk; coconut milk wouldn't be out of place, but it's not exactly neutral, and might kick the flavour profile in a more South Indian direction (which is fine, if you want to go that way). If you want to keep it a bit more neutral, I'd suggest unsweetened almond milk. Crushed almonds and other nuts appear in plenty of Mughlai and Hyderabadi recipes anyway.
Technique Notes
If you've made biryani before, you'll find the techniques used here quite straightforward - especially given that there's no meat to worry about. That being said, I've tried to provide some helpful tips on building the recipe and the cooking techniques that I think are the most useful to keep in mind.
Soaking & Parboiling the Rice
You're effectively hydrating the rice in three steps - soaking, parboiling, and then dum cooking. Too much of any one step and you can end up with mushy rice. Too little and the rice can be hard or dry. Soaking the rice gives it a jump start on hydration, reducing the total cooking time needed. This is particularly useful when making biryani, as the dum cooking method uses a less intense, indirect heat to cook the rice a bit slower. Interestingly, soaking basmati rice may also have an impact on the flavour, as explained in this article from Fine Cooking. Some of the distinctive flavour of basmati rice is thanks to a heat-sensitive compound called 2-acetyl-1-pyrroline. Soaking the rice reduces the total cooking time (and/or heat intensity required), causing less of the compound to break down during the cooking process.
The parboiling step is a very important one to keep an eye on. I found little in the way of consensus about the duration of this step across different recipes - partly because different types of biryani require longer dum cooking steps, and partly because (I would imagine) there is some variation based on elevation and rice varieties. For this egg biryani recipe, you want your rice to be about 75% cooked before it goes into the pot for dum cooking.
Great.... what does that mean? Well, it's tough to say precisely. At sea level, on my stove, it took about 7 minutes to get to that point. To gauge whether or not your rice is ready, lift a couple of grains out of the water every few minutes. Break them into pieces with your fingers, or take a bite of them. They're ready when they're a just a bit hard inside (sort of 'al dente'). If the rice is totally soft, you've gone to far, and you might want to set it aside for another meal (it is perfectly good at this stage, but it will overcook when used to make biryani) and start a second batch. Once you're confident that the parboiling is done, drain the rice and rinse it immediately. This halts the cooking process and eliminates excess starch that can make your rice sticky.
Dum Cooking
Dum cooking, or dum pukht (دمپخت in Persian, दम पुख्त in Hindi), is a cooking method that uses indirect heat and a sealed container in order to slowly cook food while retaining all of the moisture and flavour. The cooking vessel may be sealed with a pastry top, but it's become increasingly common to use a tight-fitting pot lid. There's a good overview of the overview of the history of the method (along with some lovely recipes) here on NDTV's website.
Dum cooking might sound a little intimidating at first, but it's actually quite simple to manage at home with the right tools. You'll need 1) a large cooking pot that can be sealed tightly, and 2) a heavy-bottomed frying pan. I used a large Dutch oven with a metal lid and my trusty jumbo cast iron pan. If your pot lid has venting holes, or it doesn't fit tightly enough, cover the pot with a layer of aluminum foil, then place the lid over that.
Once you've decided on your dum cooking set up, the process is simple enough; the biryani ingredients are sealed in the pot, and the pot is placed on the pan, which is then placed on the stovetop. The heavy pan heats the pot indirectly, thereby preventing hot spots and keeping the temperature from spiking too much.
If you don't have a heavy pan that you can use to provide the low, indirect heat needed for dum cooking, there are alternatives. If your cooking pot is thick-bottomed enough, and IF you can ensure a low enough heat, then you can cook the biryani directly on the stovetop. If your pots are prone to hotspots, or if your stove tends to run very hot (as many electric stoves do) this might be tricky. Another possibility is to begin cooking the biryani over a direct flame, then transfer the sealed pot to a warm, low oven (I would try around 200°F/95°C) to finish cooking. In theory, I think you'd be able to finish your biryani using the low-temperature settings on an Instant Pot or slow cooker, but I haven't been able to experiment with this yet. If you have any tips, please feel free to mention them in the comments below!
The Eggs!
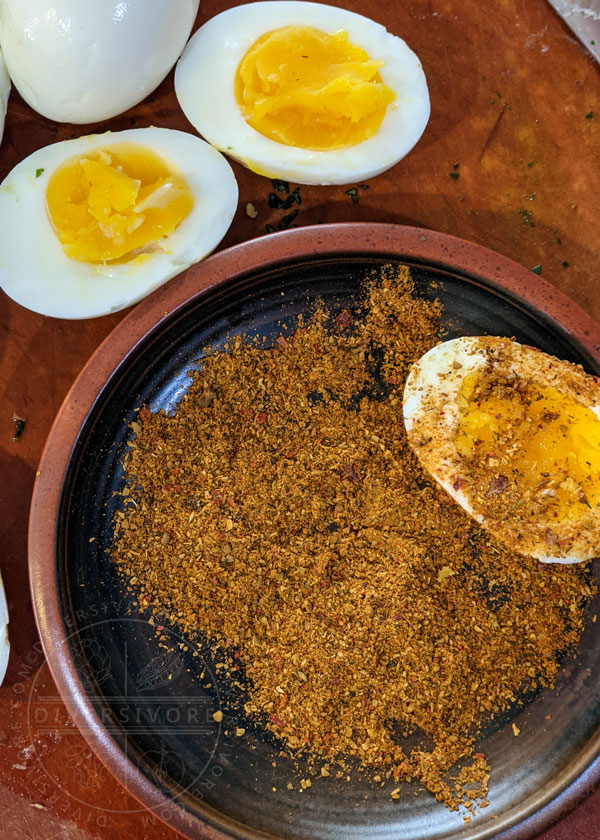
Eggs are one of the stars of this recipe, but they don't demand a lot of attention in the preparation. You can hard-boil them anyway you like, but I personally like to leave them a little on the soft side so that the yolks don't dry out too much with the remaining two cooking steps (frying and dum cooking).
My egg biryani recipe specifies dipping the boiled eggs in spices before frying them in the leftover gravy (plus some ghee or oil). I like the flavourful, crispy results - but you can also simplify things a bit by tossing the halved eggs into the gravy itself for the last minute or two of cooking. You won't get crispy fried bits on the eggs, but they'll still absorb the flavours nicely.
Organization & Assembly
If you're not organized when you're making biryani, you're going to have a very bad time. To make things go as smoothly as possible, I'm going to use this section to lay out a timeline for cooking, and two clarify how to build (i.e. layer) your biryani.
TIMELINE
This is one of those recipes that can take you an hour to make if you're organized, and two hours if you're not. Planning out when to complete each step and working while the various components are sitting will help you streamline the whole process. Here's the timeline I recommend:
- Make the saffron milk right at the beginning, or even earlier in the day. The longer it sits, the more saffron taste you'll get (to a point, of course).
- Chop all your herbs and veggies, and measure out your spices. Be sure to separate your spices for the rice-making step from the ones needed for gravy.
- Soak the rice and prep the eggs (boil and peel). Ideally, you'll be finished this step right around the time that the rice is ready to parboil.
- Parboil the rice. I don't recommend any multi-tasking at this stage, as you really want to keep an eye on how much the rice cooks.
- Make the gravy.
- Fry the eggs in the gravy pan.
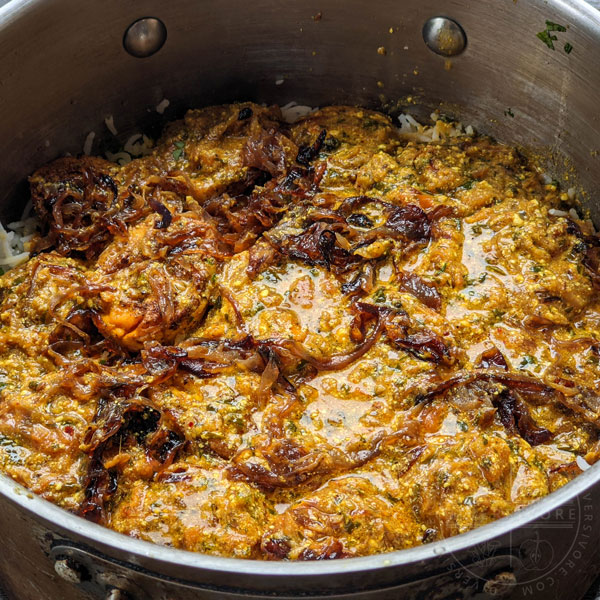
- Layer your egg biryani, seal it, and cook!
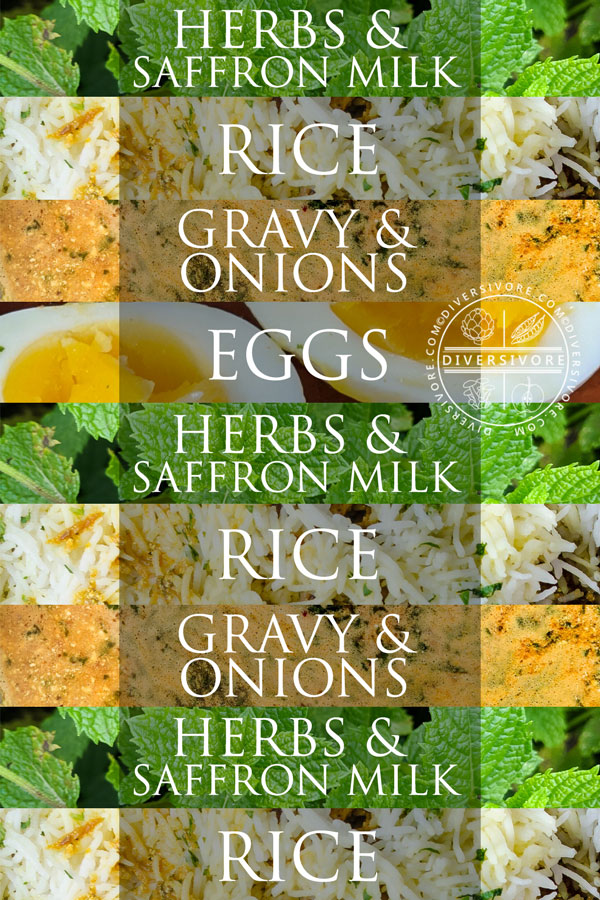
ASSEMBLY
I put together the handy little diagram below to make this section a bit clearer, though I will note that there's no single rule for building your biryani. You could, in theory, do fewer layers, but I like this method as it keeps any one layer from being too thick and missing out on all those nicely intermingled flavours.
The diagram above simplifies things a bit, but make sure that you note that there are a few things going on at the various layers; don't forget the saffron milk or the fried onions!
Note: Nutritional Information is given for a single serving (1/8th portion of the total recipe) including one whole egg.
Nutritional Summary
Ingredient Pages
No ingredient pages have been written yet for any of the ingredients in this recipe. Like to see one? Let me know in the comments below or by email.
Pantry Pages
No pantry pages have been written yet for any of the ingredients in this recipe. Like to see one? Let me know in the comments below or by email.


Hyderabadi Egg Biryani
Ingredients
Saffron Milk
- 5-6 threads saffron
- 1/2 cup milk
Rice
- 15 oz basmati rice (~2.25 cups) preferably aged
- 6 cups water
- 1/2 tsp salt
- 1 tbsp ghee or oil
- 1 Indian bay leaf (tejpat)
- 1 stick cinnamon
- 1 star anise
- 2 green cardamom pods
Gravy
- 3 tbsp ghee
- 1 tsp cumin seeds
- 1/4 tsp ground cinnamon
- 4 green cardamom pods lightly crushed
- 10 black peppercorns
- 2 tbsp ginger-garlic paste (see note)
- 1 cup chopped tomato fresh or canned
- 1/4 cup fried onions (see note)
- 1 tsp kashmiri chili powder
- 1 tsp ground coriander
- 1/2 tsp turmeric
- 1 tsp biryani masala (see note)
- 2 tbsp cilantro finely chopped
- 1 tbsp mint finely chopped
- 1/2 tsp salt
- 1 cup plain yogurt (curd)
- 3/4 cup water
Eggs
- 8 hard boiled eggs
- 2 tsp biryani masala
- 1/4 tsp salt
To Assemble
- 2 tbsp cilantro finely chopped
- 2 tbsp mint finely chopped
- 1 cup fried onions
- 1 tbsp oil or ghee
Instructions
Saffron Milk
- Wrap the saffron in a small piece of aluminum foil, then toast in a hot frying pan for about 30 seconds.
- Add the toasted saffron to the milk and set aside.
Rice
- Rinse the basmati very well, and drain thoroughly.
- Soak the rice in fresh water for ~30 minutes. If you're ready to parboil the rice, continue to the next step; otherwise, cover the rice and set it aside.
- Add the water and spices to a large pot and bring to a boil. Add rice, stirring regularly but gently. Boil until the rice is about 75% cooked; approximately 7 minutes. Drain thoroughly and rinse gently with cold water. Pick out and discard the large spices.
Gravy
- Heat the ghee in a frying pan over medium heat. Sauté the gravy spices (cumin, cinnamon, cardamom, cloves, bay leaves, black pepper) briefly.
- Add the ginger-garlic paste and cook for about 1 minute.
- Add the chopped tomatoes and cook for an additional 3-4 minutes.
- Add the fried onions, Kashmiri chili powder, coriander, turmeric. Cook for an additional 1-2 minutes.
- Stir in the biryani masala, cilantro, mint, salt, and yogurt (curd). Mix well, and bring to a simmer over medium heat.
- Add water to the pan, then return to a simmer. Cook over low heat for 2 minutes. Add salt to taste.Note: Do not clean out your pan when you're finished! You can transfer your gravy to a separate bowl if you wish, but you want to leave the leftover gravy in the pan for frying the spiced eggs (see below).
Eggs
- (Note: you can boil the eggs any way you prefer - this is my favourite method)Bring a large pot of water to a rolling boil. Add the eggs, the cover the pot and turn off the heat. Leave eggs for 7-8 minutes for somewhat soft yolk, 9-10 for fully set yolk. Transfer cooked eggs to a bowl of cold water.
- Peel and halve eggs after they've cooled.
- Combine the salt and masala. Dip the cut face of the eggs in mixture.
- Fry the eggs in the gravy pan with 1 tbsp of ghee (or oil) until crispy.
Assembly
- Oil the bottom of the cooking pot. Assemble the layers in the following order:1) 1/3 of the rice2) 1/3 of the herbs and saffron milk3) 1/2 gravy and onions4) 1/3 of the rice5) 1/3 of the herbs and saffron milk6) Eggs7) Remaining gravy and onions8) Remaining rice9) Remaining herbs and saffron milk
- Dum cook the biryani (see note) for 5 minutes over high heat, then 20-25 minutes over low heat.
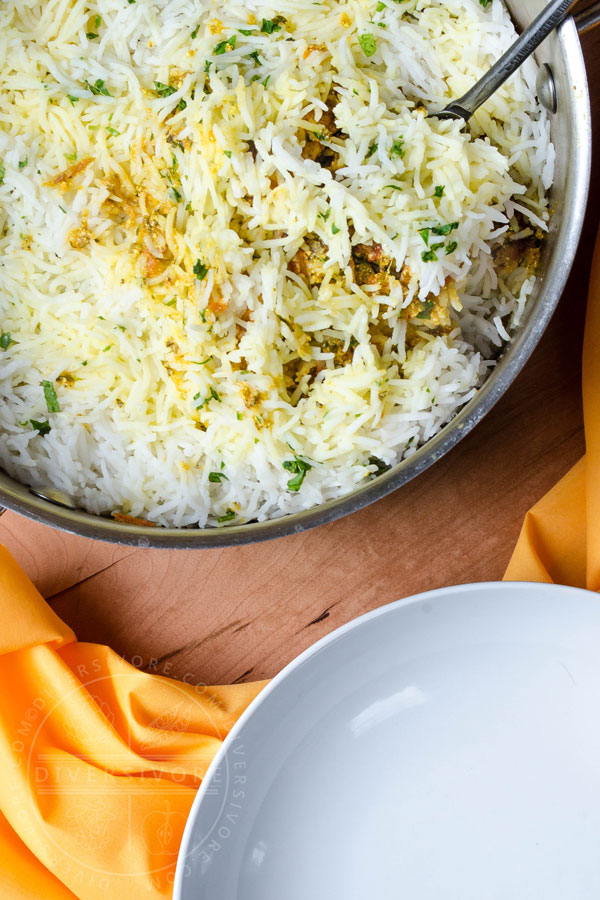
- Uncover the rice immediately before serving. I like to mix the biryani a bit, but take care not to overdo it. Serve with raita, chutney, bread, etc.
Notes
Nutrition
More Indian Recipes on Diversivore
Roasted Okra Kuzhambu
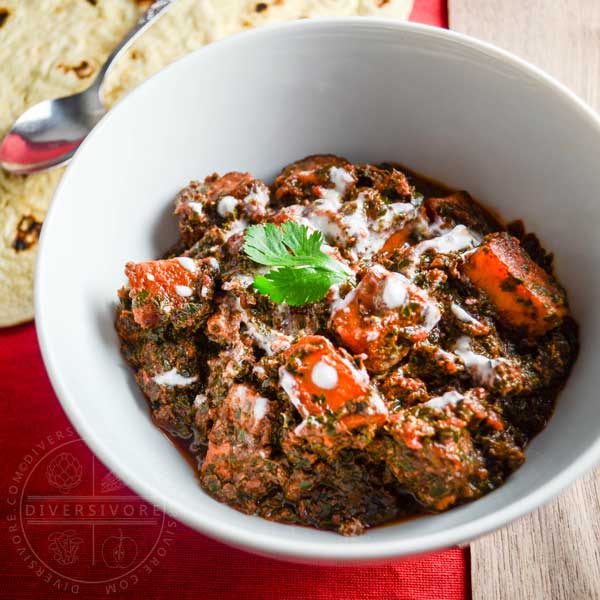
Beet Green Saag Paneer
Indian Spiced Shepherd's Pie

Share this Recipe
Comments
If ever there was a time that I wished for smell-o-net this would be it. My God, I could just reach in there with a fork. I haven’t had a biryani in ages and one of my guilty secrets is egg curry. So darn good.
I’ve wished for smell-o-net so many times. Definitely need a toggle on and off though. Some sites out there that I definitely don’t want to be smelling….
Wow – such delicious comfort food with so many layers of flavour.
Thank you for introducing me to Hyderabadi cuisine! I am not familiar to that part of the world so it is great to learn about a new culture!!
Whenever I am about to read one of your recipe posts, I feel as if I’m about to curl up with a good book and I need to go get a cuppa tea that I can sip as I read! I love the peek into your love of stamps and how it all led into this wonderful woven history, culture, and food lesson. This dish looks amazing and can imagine it being the most wonderful of comfort foods. Thanks for sharing all your knowledge and this recipe!
Thank you Lisa – that means a lot to me. I’m so glad you enjoy the posts, the writing, and of course the recipes! Cheers.
I didn’t know there were different versions of biryani, I just know that I love it. This recipe looks amazingly flavourful, and I just want to plateful right now! Thanks for explaining how to use the dum cooking method at home, too.
My pleasure! Biryani is wonderfully diverse stuff – and a lot of fun to explore in detail once you’ve made a couple!
Beautiful share and you have covered all the components of the Egg biryani so well. Yes the addition of whole spices in a biryani is indeed what gives the biryani the hyderabadi heat VS other Biryani’s. Kudos to you in making the Birista from scratch too.
Thanks so much! It’s probably for the best that I made the birista. If I have a jar of crispy fried onions beside me, they might not last long enough to make it into the biryani….
I can’t wait to try this for our next egg night- pinned! I think that’s so ‘cool’ that you collected stamps!😊
Thanks Terri! It’s certainly not a hobby with a terribly cool reputation, but I think it’s a pretty fascinating one!
What an incredibly flavourful recipe. I love how you’ve developed flavour and complexity with each component. This is a real crowd-pleaser!
Whenever I read your recipe posts, I’m so inspired by the research you do to make sure the recipe is authentic, explaining everything so clearly that even people who have never tried the recipe before can make them with no confusions. The stamp looks so beautiful! Such a precious gift from your grandfather! Your Hyderabadi Egg Biryani looks fantastic and has made me want to reach for it through the screen, if only that were possible!
Thank you Vijitha! I love writing this stuff, and I’m always happy when people appreciate the content (and the work behind it). And as for reaching through the screen – well, that would certainly change the face of food blogging, wouldn’t it? If only! Hah!
ahh i just had BIRYANI yesterday. Thanks for this wonderful recipe and detailed description.