
Homemade Pandesal
Filipino Bread Rolls
Share this Recipe
This recipe for Pandesal (Filipino bread rolls) is brought to you in collaboration with BC Egg, who have financially compensated me to produce this recipe. All opinions are my own.
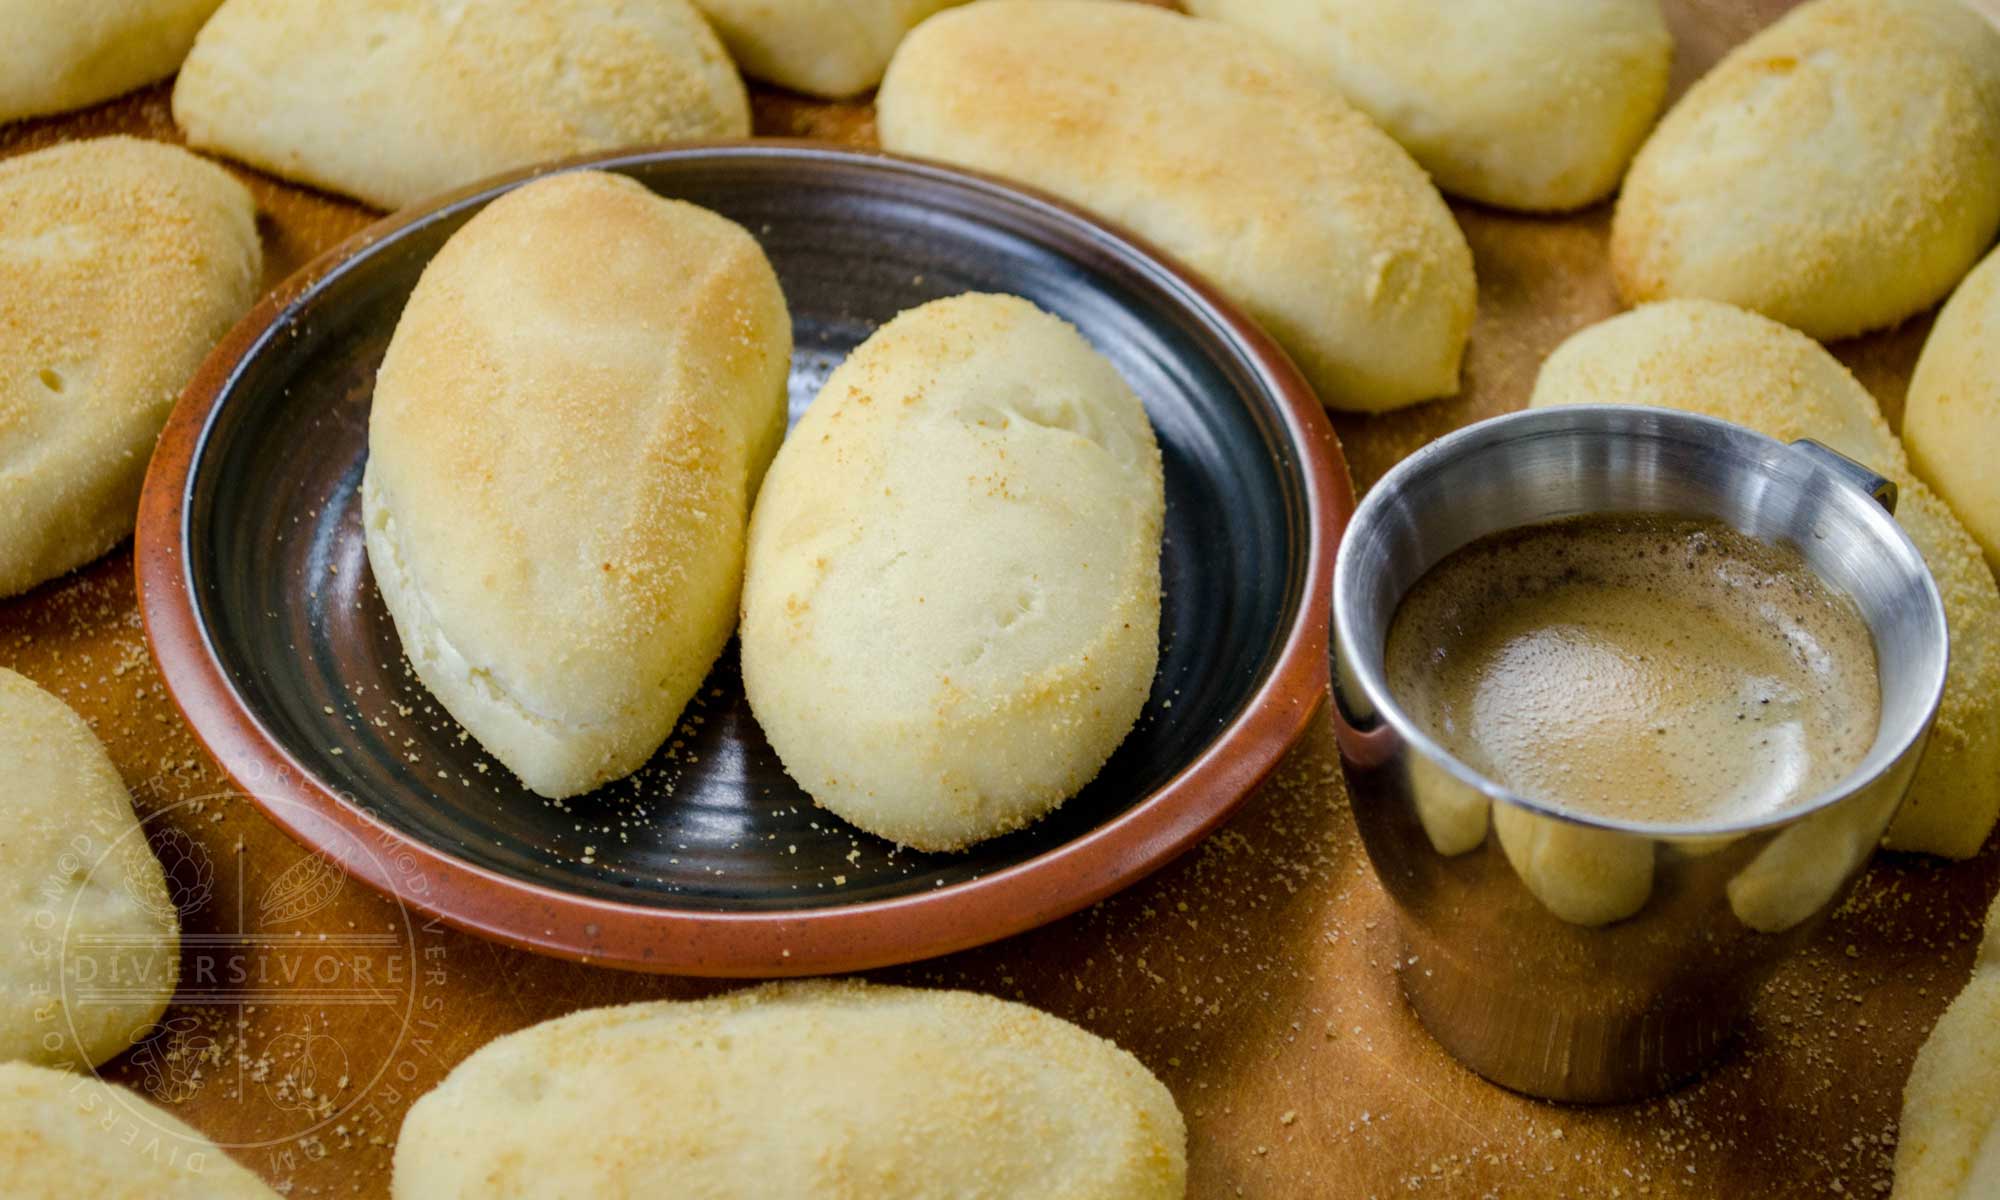
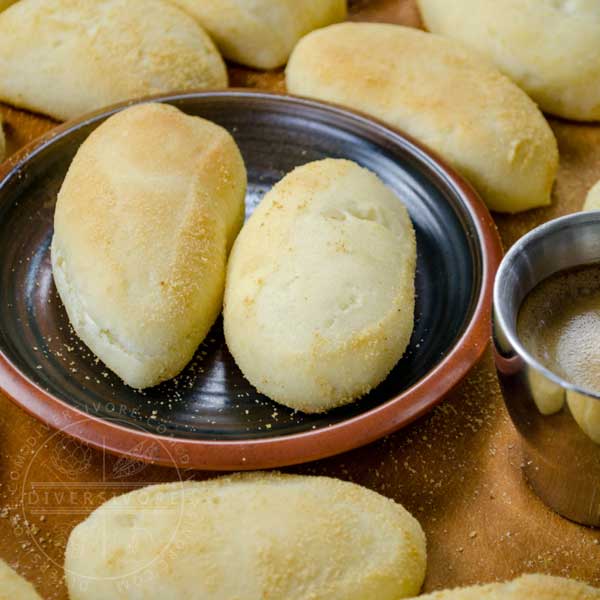
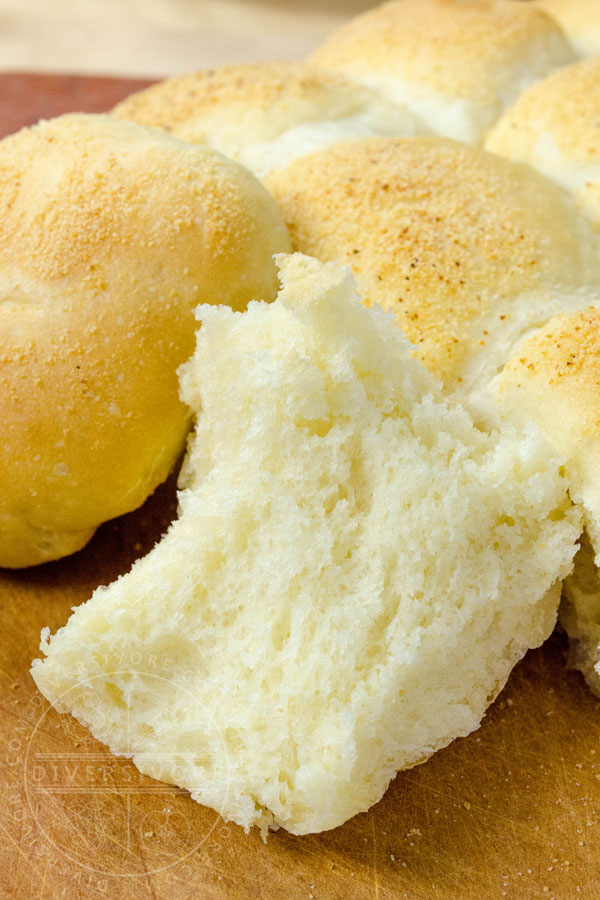
Pandesal (Filipino bread rolls) are easily one of the most beloved foods of the Philippines. Made with simple ingredients, and enriched with milk and eggs, they're crispy on the outside and wonderfully soft on the inside. Make them at home easily with this recipe, and more importantly, learn how best to adapt them to your own tastes and ingredients with detailed notes on the flour, yeast, shaping methods, baking techniques, and much more.
Good bread is the most fundamentally satisfying of all foods; and good bread with fresh butter, the greatest of feasts.
What can you say about bread? I mean, quite a lot I suppose - I had a pretty substantial selection of quotes to choose from to open up this section. It seems that the universal and beloved nature of bread makes it a pretty popular topic of conversation, not to mention a fertile metaphor. But what can I say about bread? Well, I hope I can say something practical and useful - though I'll refrain from waxing too poetic today. (As a side note, the real-time pause I took between writing those last two sentences was both embarrassingly long and hilariously telling).
Pandesal is a Filipino bread. Most would argue that it's the Filipino bread. The name pandesal comes from the Spanish pan de sal (a spelling that's also used in the Philippines) meaning 'salt bread,' though the bread is rarely salty in its modern form. Its origins lie in the colonial history of the Philippines, and in the simple, crusty breads and rolls imported to the islands from Spain.1 The direct predecessor of modern pandesal was the simple pan de sal de suelo rolls made on the floor (suelo) of wood-burning pugon oven. Pan de sal de suelo was (and still is) made without eggs or milk, and with little or no added sugar - much more like a simple crusty European loaf. But an interesting combination of factors led to its evolution into the modern and distinctly Filipino staple that is pandesal.
The Spanish-American war of 1898 led to the cession of the Philippines to the USA, beginning the period of American colonial control that saw the mass importation of American wheat flour, dairy (especially butter and condensed milk) and commercial yeast. The ready availability of these ingredients, coupled with the colonialist promotion of American dietary norms, led to an explosion in bread making and baking. The comparatively low-protein flour being imported made for softer, less chewy breads, while a local penchant for sweetness meant that inexpensive sugar soon found its way into pandesal, shifting the taste profile away from its saltier roots. The trend towards sweeter, softer bread led to the incorporation of eggs for richness and dairy for softness and flavour - though it's worth noting that there are still many variations of pandesal made with variations and/or omissions of these ingredients. By the early 20th century, pandesal had largely become the bread that it is today: a little sweet, crisp on the outside, soft and delicate on the inside, and thoroughly beloved by all.
1 European bread culture is actually a fairly complex, massively intertwined, historically murky subject. Pandesal is often described as a Spanish/Filipino variation on the French baguette, but this is something of an oversimplification. For the sake of simplicity we'll just focus on the Spanish colonial roots of pandesal here.
Bread & Belonging
Bread is incredibly simple in so many ways, and yet the making of it involves taking into account a seemingly endless array of minor variations in ingredients and conditions. Seemingly small differences in the type of flour and oven conditions can make or break your bread, and learning to deal with this can be incredibly frustrating. This is part of the reason that so many of us prefer to let bakeries do the heavy lifting for us - they've got the time, ingredients, and equipment needed to make good bread consistently. Why then do we bother with trying to make good bread at home? It depends a great deal on the person; some adore the challenge (these 'culinary masochists' are very much my people). Others do it because it's thrifty, or because they prefer to have control over the ingredients in their food. But for an enormous number of people, the desire to make pandesal is connected to a longing for home and culture. An incredible 12 million Filipinos live and work outside of their home country - a number that adds up to a whopping 11% of the total population.2 There are over 837,000 Filipinos in my home country of Canada - some 2.4% of the population, and growing. I'm proud to say that this community includes my wonderful sister-in-law, who kindly helped me figure out where to get started with this recipe and post.
Some Filipino communities have become big enough to support panaderias (bakeries) that specialize in the many and varied delights of the Philippines. But as is so often the case with diasporas, the familiar comfort foods of home can be maddeningly hard to find. In this respect, pandesal has two things going for it: it's a nearly universal favourite, and it uses ingredients that are fairly globally common. It can be difficult - if not impossible - to make pandesal that tastes just like the ones from your favourite little shop, or the ones that a beloved family member made when you were growing up - but it's something that's clearly worth trying for a great many people.
As a non-Filipino, I owe a debt to some of the incredible and passionate bakers and writers that have written about pandesal before me. I want to give a shout-out to The Little Epicurean in particular, whose clear and well-written pandesal recipe helped me begin to address the complexities detailed in the Recipe Notes below. I learned a lot about the culture of pandesal from these articles from Eater and Grid Magazine, and I'd encourage you to read them if you're interested in knowing more. Most of all, I have to thank the Filipino friends and family in my life whose unbridled enthusiasm for pandesal helped me persevere through the many, many iterations and tests this recipe required. Passion is the greatest inspiration.
2 This number includes residents of the Philippines living and working overseas, as well as those who have settled permanently as citizens or residents in other countries.
I spent a very, very long time writing the Recipe Notes section for this post. So while there's still a lot to say about the culture and variety of pandesal, I'm going to cut myself off now because a) there are tons of notes below, and b) I'm exhausted.
Pandesal isn't difficult to make. Honestly, I'm saying that to myself as much as I'm saying it to you. What can be difficult is understanding why your pandesal just isn't quite right. Bread in general, is maddeningly difficult to perfect. The deceptive simplicity of the ingredients belies the incredible complexity and artistry behind truly great bread. What I've tried to create here isn't so much a recipe, but a guide to making and understanding pandesal. If you click down to the recipe card and dive right in, you should be able to make a good, maybe even great batch of pandesal. But 10 different people, working from the same recipe, can end up with 10 entirely on the variations in their ingredients, ovens, and even locations. I've done everything I can think of to put together a great pandesal recipe, but the real key to success lies in understanding not the what, but the why. Because of this, I genuinely hope that my pandesal recipe transforms into your pandesal recipe. Adapt it to your kitchen, to your ingredients, and to your personality. If you find that you can't understand something, or that you need help, ask me in the comments section below. Likewise, if you've got a tip or trick that you think my readers might benefit from, I'd love to hear from you.
Pandesal Recipe Notes
This section is pretty substantial, so if you're suddenly wondering what you've gotten yourself into, relax. I'll reiterate (for anybody who jumped ahead) that pandesal isn't all that difficult to make. This section is meant to help you take your pandesal from good to great. This will almost certainly involve making a few batches, and reading through to understand and adapt the recipe to your own ingredients and kitchen. The notes here are meant to help you understand and troubleshoot, giving you the know-how you need to get your pandesal turning out the way you want it. If you're brand new to making pandesal, I'd recommend reading the notes about flour, then giving the recipe a shot more-or-less as written, without too much concern for the other sections. Once you've done that (or if you've been trying to perfect your pandesal for a while), try working through all of the notes to see what will help you get to where you want to be. It's worth remembering that a) personal preferences can dictate a lot about how you prepare this recipe, and b) variations in climate, elevation, humidity, and ingredients can have a substantial impact on how bread turns out, so it's difficult to generalize about what any one baker or another will need to do.
In the first section we'll talk about ingredients, while the second section will focus more on techniques.
Ingredients & Variations
Breads are generally made from the simplest of ingredients. You'd think that would make them easy to figure out, but I think we all know that's not really the case. The funny thing about 'simple' ingredients is how wildly variable they can actually be.
While you will find some notes about substitutions here, the primary purpose of this section is to help you best address the subtle-but-important variations that can exist between ingredients. If you have an ingredient question that isn't addressed here, please leave a comment below!

Milk
I use whole milk (3.25% milk fat). You can use any fat content milk without affecting the recipe too much, but you may want to add a little bit more butter if you're using a low-fat milk.
Pandesal is often made with evaporated milk and water, mixed at a 50:50 ratio. Evaporated milk is shelf-stable and easy to use, making it a popular baking choice in warm parts of the world (like the Philippines). It also has a slightly caramelized flavour that works nicely in breads, so some people like to use it regardless of the availability of fresh milk. You can substitute evaporated milk into this recipe by combining a scant 2/3 cup of evaporated milk mixed with 2/3 cup of water.
Note that evaporated milk is not the same thing as sweetened condensed milk! Both are concentrated by evaporating some of the water content, but sweetened condensed milk also adds a whole bunch of added sugar. In theory (and I haven't tried this, so please be cautious), you could use approximately 1/2 cup of sweetened condensed milk, 3/4 cup of water, and omit the added sugar from the recipe. If you do happen to give this a try, I'd love to hear from you.
Pandesal can also be made with water, so there's nothing wrong with swapping out milk entirely. That being said, water-based pandesal (which usually also omits eggs) is generally a dryer, firmer, simpler sort of bread roll. Still tasty, but different.
Given that water alone can be used to make pandesal, milk alternatives (e.g. soy milk, nut milks, oat milk, etc.) should all work fine. I haven't tested them all out, but I see no reason that they'd cause any problems. Feel free to leave a comment below if you've tried any of them out.
Yeast & Sourdough
As with any bread, you've got a few different leavening options at your disposal. I've compiled some notes here to help you make pandesal with whatever leavening option is easiest for you. Most of these notes will address yeast, but I've included some basic information about working with a sourdough (levain) starter as well. There will be more on that subject coming soon in a future recipe.
I generally like to use active dry yeast, but you can easily use instant or fresh yeast too. You do want to make sure that whatever yeast you're using has been stored under appropriate conditions and has remained active. Active dry yeast is quite sensitive stuff, but because you have to proof it, you'll know if it's alive or not before you add it to your dough. Instant yeast tends is very stable, but it can still be dead (and therefore useless) if it's too old or been stored in an overly warm location. Fresh yeast isn't meant for long-term storage, so it's not generally a question of whether or not it's alive/active (plus it requires activation/blooming, so you'll know).
Here's a bit of basic information to help you figure out how to make substitutions.
- Active Dry Yeast - This is what I like to use, and what most of the batches were tested with. I found that 2 teaspoons of yeast worked quite nicely, but you can use 2.25 teaspoons too. I mention this because if you use packets of yeast, you'll see that they usually come in 7 gram (0.75 ounce) increments, which corresponds to 2.25 teaspoons. If you're using a big jar of properly-stored, fairly fresh yeast, 2 teaspoons will be fine, but if you're using a packet you can go ahead and use the whole thing. If your yeast is a bit older, or if it's been stored at room temperature for a long time, try using a bit more (or cutting your losses and buying some new stuff).
- Instant Yeast - Also called rapid-rise yeast, this stuff requires no proofing and can be added directly to the dough (see the recipe itself for instructions). You'll want to use about 25% less than you would for active dry yeast - about 1.5 teaspoons should do.
- Bread Machine Yeast - An instant yeast variety that you'll be unsurprised to hear is specifically meant to be used in bread machines. If you happen to have some around that you need to use up, it should behave more-or-less like regular instant yeast. It tends not to do well in refrigerated doughs, but that shouldn't affect you here unless you intend to retard the rising cycle by putting the dough in the fridge.
- Fast-Acting Yeast - This is a type of instant yeast that, unsurprisingly, is meant to activate and rise very quickly. Fast-acting yeast is NOT meant for doughs that have to rise twice, so you DO NOT want to use it to make pandesal.
- Fresh Yeast - Also called cake yeast (because of the blocks it comes in, not because it's used in cakes), this is a product is basically a living, hydrated yeast. If you're a fan of using fresh yeast, you can easily substitute it into your pandesal, but you'll need to use more; about 18 g (0.6 ounces) by weight. Fresh yeast needs to be crumbled up and mixed gently with milk and sugar to activate it, much like active dry yeast.
To sum up for this recipe: 2 (or 2.25 tsp) active dry yeast = 1.5 tsp instant yeast = 18 g (0.6 ounces) fresh yeast.
So what about sourdough? Well, sourdough baking really does deserve it's own write-up - which is why I'm going to post a separate recipe very soon! In the meantime, I'll give a very basic breakdown.
If you want to use sourdough, you can omit all yeasts, and instead incorporate 200 grams (7 ounces, or about 1 cup) of fully hydrated, active sourdough starter. You'll need to decrease the amount of flour in the recipe to about 4.25 cups (510 grams), and the amount of milk to 1 cup (240 ml). Sourdough pandesal takes much longer to rise than yeast pandesal, so you'll want to plan accordingly. My sourdough batch took about 8 hours to rise fully, and a further hour for the shaped buns to puff up enough to bake.
Flour
What type of flour to use when making pandesal - or indeed any bread - is something that gets debated a lot. Ultimately, it's a bit of a complicated subject.
First of all, let's quickly review why any of this matters. White wheat flour is made by grinding the endosperm of wheat into a fine powder. The type of wheat used, along with the processing method(s), can cause the resulting flour to vary quite a bit in terms of the overall protein content and the texture (fineness). Protein content matters a great deal, as higher protein wheat creates more gluten. Gluten gives wheat-based baked goods an elastic structure that traps the gases produced by yeasts during the bread making process, giving bread it's airy texture. Low protein content makes for a very fine, cake-like crumb, while high protein content makes for an airier, looser, and chewier crumb. The fineness of flour matters too, as it determines how quickly and easily your flour will absorb liquid. Varying degrees of fineness can also make it difficult to compare volume-based measurements of flour, which is part of the reason that many serious bakers prefer to use weight-based measurements.
I made all of the batches for this post with an all-purpose bakers flour - but that doesn't mean that you'll get exactly the same results if you do the same thing. Here in in Canada, all purpose flour is generally fairly high in protein (somewhere in the 12-13% range). Many US all-purpose flour brands are in a similar range (11-13%), but some are much lower (8-10%). Of course, because nothing's ever easy, this just gets more complicated when we start looking at other countries and processing methods.
So what should you use if you're looking for a fairly high-protein content flour for your bread? Ultimately I'd encourage you to do some searching on the web for information related to your specific region, but this basic list should get you started:
- Canada - All-purpose flour (APF) is generally perfect to use. It's worth mentioning that Canadian wheat is held in very high esteem throughout the world, and you may actually find Canadian wheat flour for sale in other countries as well.
- USA - Use an APF with a higher protein content (try researching specific brands), or a 1:1 mixture of lower-protein APF and bread flour.
- UK, Australia, & New Zealand - Use strong flour (aka hard flour), or a 1:1 mix of plain flour and strong flour. Plain flour is similar to APF in some respects, but it's generally low in protein (<10%).
- France - Type 55 flour is generally around 11% protein, so it should work well, but you may want to mix in a little type 80 flour to harden it up a bit.
- Germany - A 1:1 mixture of 550 and 812 flours should get you in the 11-12% protein range.
- Italy - Italian flours are generally quite soft (low in protein). Your best bet is to mix regular type 0 flour (9-10% protein) with type 0 Manitoba Farina, which is made from high-protein wheat. Try a 1:1 ratio for starters.
- Philippines - Many manufacturers label specific flours are labeled as being best for pandesal. Hard flours are generally recommended, but those who like a softer pandesal might prefer to mix a hard flour with a soft, siopao, or all purpose variety.
A few notes about flour types NOT to use:
- Cake flour - soft, fine, and low in protein, these flours don't allow enough gluten to form in the dough. That being said, a mixture of cake flour and a very high protein flour could be used in a pinch.
- Self-rising flour - this product contains added salt and baking powder. It's also lower in protein.
- Whole wheat flour - whole wheat flour has varying protein contents, tastes very different, and absorbs a lot more moisture than white flour. I'm sure it's possible to make a good whole wheat pandesal, but you'd need to rework this recipe entirely.
- Gluten-free (non-wheat) flours - there's probably a way to make a good gluten-free pandesal, but it will most likely involve a lot more trial and error than simply swapping out the flour.
Finally, I want to make a quick note about bleached vs unbleached flours. Unbleached flours are whitened by aging, while bleached flours are whitened through the use of chemical agents. Two popular chemical bleaching agents in use are benzoyl peroxide and ascorbic acid. These whiten and mature (improve gluten content) the flour respectively. Potassium bromate is also used to mature some flours, though it is banned in Canada, the UK, and the EU. Chlorination is another common process that both whitens and matures flour, but this process is generally only used for North American cake flours. Bleached flour has a finer grain, and absorbs moisture faster and more readily than unbleached flour. I won't get further into the controversies and complexities of this subject right now, but rest assured that you should be able to make great pandesal with either type as long as you pay attention to your moisture levels.
Ultimately, I leave it up to you to decide what flour(s) to use for your recipe, but it's worth remembering that a) it might take a bit of trial and error to figure out what works best in your area, and b) your personal preferences play a major role too! Some people want a chewier pandesal, while others want a softer one. Hopefully you'll be able to adapt this recipe to your own tastes with the information I've provided here.
Salt
I use a fine grained sea salt for most of my baking and cooking. Any relatively fine salt, including table salt, can be used in this recipe. Coarse salts with large grains (including flaky sea salts) aren't ideal for using in baking, as they don't dissolve as readily, and are more difficult to measure accurately by volume.
Butter & Oil
I use both butter and oil in this recipe for different reasons. Butter is great for flavour, and many people (myself included) really like pandesal to have a bit of a buttery taste. Oil is easier to work with in a dough, and tends to keep breads moist a little bit longer. If you want to use all one or the other, you can (butter does contain a bit of water, but the quantities are small enough that you can substitute everything 1:1 in this recipe).
I used canola oil, but any light, neutral vegetable oil should work nicely.
Sugar
Pandesal - especially pandesal made with eggs and milk - is generally moderately sweet. The simpler, leaner form (made without eggs/milk) often uses less sugar, but there are no strict rules of course. If you want to make your pandesal more or less sweet, you can adjust the sugar content a little in either direction without too much difficulty.
I used ordinary white granulated sugar for my pandesal. While I haven't tested it myself, I think you should be able to use any of the less-processed light/fine sugars (e.g. fine organic cane sugar). I would avoid coarse sugars, as they're harder to dissolve evenly into the dough. I haven't personally tested any sugar substitutes (e.g. stevia), but if you do try it, be aware that the pandesal won't brown quite as much in the absence of true sugar (which browns and adds complex flavour thanks to the Maillard reaction). Decreasing the sugar content, either with a sugar substitute or by decreasing the amount of actual sugar used, may also impact your rising times somewhat. This is because the yeast will have less sugar to chow down on, and will therefore reproduce more slowly. The yeast can still use the naturally occurring carbohydrates in the milk and in the flour, so I don't think you'd have any problems getting the dough to rise, but you might find that you don't quite get the same volume in your dough.
Methods & Techniques
The sections below are sorted chronologically, so you'll find the various tips and categories in the same order as the actual steps in the recipe. Feel free to jump ahead to any one section or another if you're looking for specific information.
Weighing Ingredients
If you have a kitchen scale, I would strongly encourage you to use it when baking. If you don't have a kitchen scale... consider getting one!
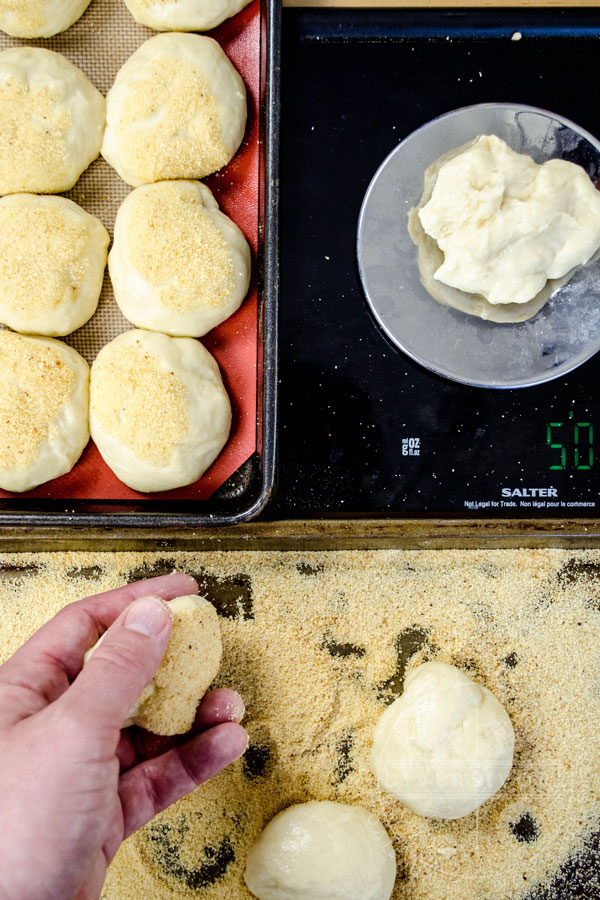
Most of my readers are American, and kitchen scales remain somewhat unpopular in American (and Canadian) kitchens. This generally isn't a big deal, but when it comes to baking, working with weights makes everything much easier, and much more consistent. One cup of flour can weigh more or less depending on how fine it is, how packed it is, and other factors - but 100 grams is always 100 grams. A kitchen scale also helps you to ensure that you're dividing the dough up into equal portions (as you can see in the photo above).
Because most of my readers are coming from the USA and Canada, the default settings for the recipe card below are US Customary (i.e. cups, ounces, etc.). That being said, please take note of the little button that allows you to switch to metric. This recipe (like all my recipes) is fully annotated in metric. I personally make pandesal - and virtually all baked goods - using weights.
Stand Mixing vs. Hand Kneading
If you've got a stand mixer with a dough hook, then this dough is a breeze. Simply add the ingredients as instructed in the recipe and mix at a fairly low speed (I start at a 2 on my KitchenAid Professional 5 Plus, then work up to a 3 to really get it kneading). I find that a bit of excess flour tends to build up around the edges, so try to carefully scrape that into the dough a few times while you work. Once you've finished adding the flour (a little bit at a time), the dough should be sufficiently kneaded after about 3-4 minutes. At this point it should have formed something of a ball around the dough hook, but the base will still be stretched out and stuck to the bottom of the bowl (see image below). This is what you want, so don't feel like you need to add more flour to make the dough tighter. I turn my dough out of the mixer bowl and into a smaller bowl to rise, so this gives me a chance to make sure that it's well-kneaded, springy, and very elastic. Note that this finished dough is fairly hydrated (wet), so it tends to be a little bit sticky - but this is good, as it makes for softer, moister bread! If the dough sticks to my hands a bit, but doesn't rip apart or pull away in chunks, then I know it's where I want it. If it's much stickier than that, trying adding a bit more flour to the dough.
Kneading the dough by hand isn't terribly difficult, but it's obviously more work than with the stand mixer. The basic process is the same - combine the ingredients, adding the flour a little at a time. Kneading the dough by hand tends to take a bit longer - on the order of 5-7 minutes of kneading after you've gotten all the flour in. It's also harder to work with a somewhat sticky dough, so you may find that you need to add a little bit more flour than you would with the stand mixer. I encourage you to try and let the dough stay as wet as you can while still managing to fold and knead it, as it will yield a moister finished product.
You can also try using a hand-held mixer with a dough hook, but you're in for a bit of a bread rodeo, as the heavy ball of dough will probably toss your bowl around quite a bit. Given this, and the fact that you'll have to hold the mixer for 5 minutes or more, you might find it's actually less work just to need the dough by hand.

Leavening
If you haven't already done so, I would read the section above on yeast types and sourdough, as a fair bit of the technique related to leavening is inherent to the ingredients themselves.
I'm going to mention the most important leavening tip first, even though it involves jumping into the middle of the process a bit: make sure that you let the shaped buns rise before you bake them! You can do everything right and end up with the the nicest dough in the world, but if you don't let it proof for a second time once the pandesal has been shaped, you'll end up with flat, dense bread. Take a look at the gif below to get an idea of what I'm talking about.
Alright, on to some more general tips. Getting your pandesal dough to rise properly is, thankfully, a pretty hands-off affair. You're aiming to get the original dough to double in volume, and for the shaped buns to puff up by about 50%. All this really means is that you should take steps to cover your dough and watch it rise, but it's worth noting that the differences in ingredients and baking environments can influence how long this takes. Most yeast-made doughs should rise similarly (as I mentioned above, don't use rapid-rise yeast), but how long this takes will depend on the temperature and humidity in your home/kitchen. Sourdough (levain) pandesal will take much, much longer to rise.
In all cases, you want to make sure that you cover your dough as it rises so that the surface doesn't dry out and toughen. Plastic cling wrap is the popular choice for this. We stopped using it in our house a while ago, so I cover the dough with a reusable stretchy rubber lid, and I cover the formed buns with an inverted baking tray. You can also use foil, or a damp (but lightweight) towel.
So how can you tell when the dough has risen enough? Well, the old 'doubled-in-size' measure is a good one, but I think a lot of people feel they're never really sure exactly when their dough has hit this mark. Fortunately there are some other things to look out for! Finished dough should have an airy 'bounce' to it. If you poke it gently with a finger, the indentation should gently spring back out. As with any bread recipe, you want to avoid over-proofing your dough (i.e. letting it rise so much that the air bubbles all start bursting). That being said, because you're going to deflate the dough and roll it or shape it into buns, you can get away with letting it rise a bit too long. For this reason, and because gluten formation (and therefore texture) is time-dependent, I would say that you're better off letting your dough rise a bit too long, rather than not long enough.
If you have to pause your pandesal making for some reason, you can slow things down by sticking your covered dough in the refrigerator. The yeast will still feed and replicate there, but much more slowly. You can allow your pandesal dough to rise in the refrigerator overnight, but please note that I haven't tested this method for this particular recipe and/or this quantity of yeast. Should that change in the future, I'll be sure to update this post.
Shaping Pandesal
This section has the potential to turn into a detailed technique tutorial all on its own (which may yet happen in the future), so let me start by saying that you have two basic choices when it comes to forming your pandesal, and either one is totally fine.
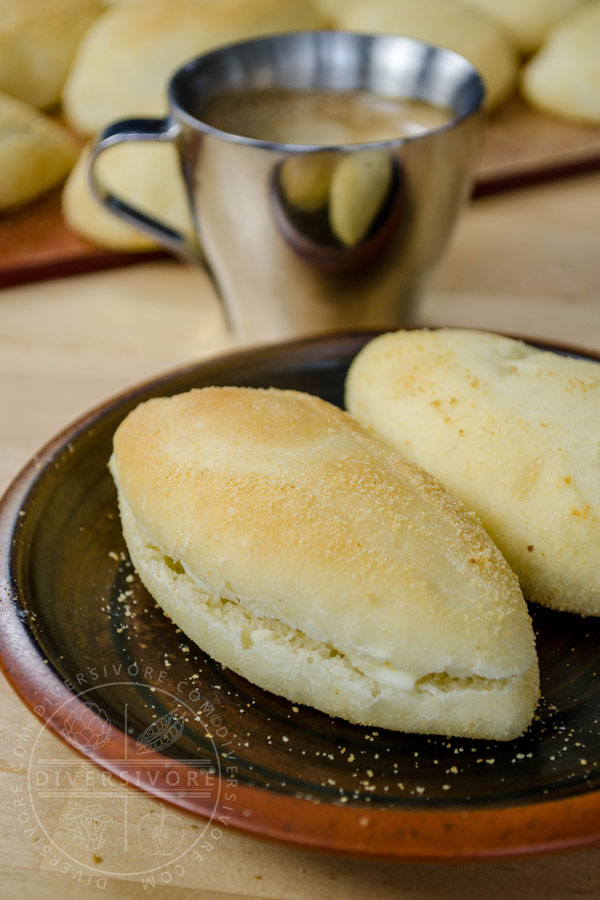
First, you can make the traditional log-like bastones (from the Spanish word bastón, meaning stick). These tucked-and-rolled dough logs are cut at an angle to produce somewhat pointed ovals. These cut pieces, called singkit (meaning 'narrow eyes'), will produce oval, somewhat flatter rolls with faint but distinctive lines on the top from the cutting process. This type of pandesal takes some practice, but it's not too tough to get the hang of, and its fairly easy to cut consistent pieces by eye. Baston pandesal tends to be the type most commonly encountered in professional bakeries.
The second option is to form the dough into a roll, then cut off evenly sized pieces and form them into smaller balls. This method is much easier, though it's a lot easier to get consistent results if you have a scale to weigh the individual portions. The second method gives you the option of spacing the buns out on the baking tray to create a crisp and uniform crust, or crowding them together to make tray-bun style pandesal with soft, bready sides. Round pandesal are popular with many home bakers. They're also the most common shape for making pandesal variations like ube and cheese.
Making Bastones
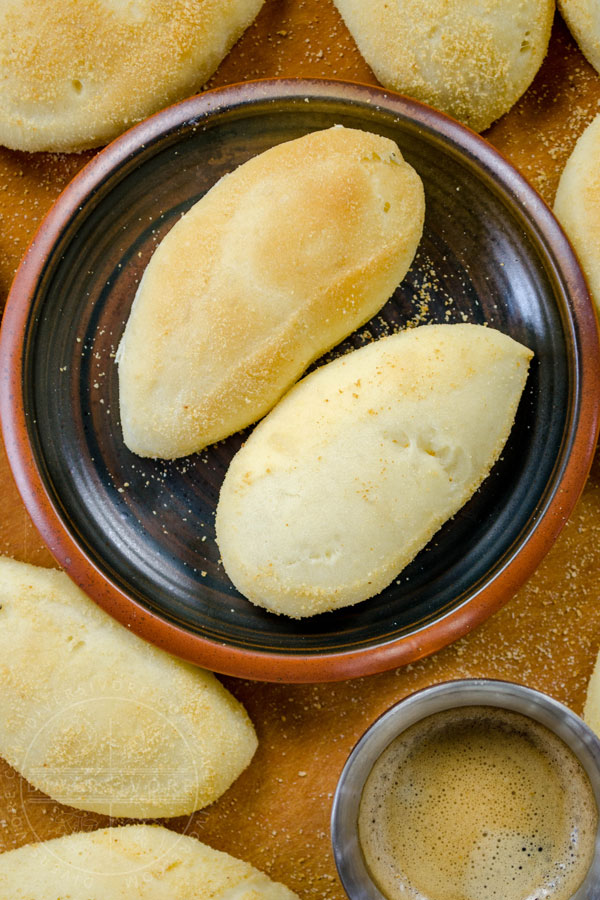
Making a baston and cutting it into singkit takes a bit of practice, but it's not that difficult once you get the hang of it. It works best for making smaller, somewhat flatter pandesal with a nice crispy crust. I personally think that this makes these the nicer pandesal to have with coffee.
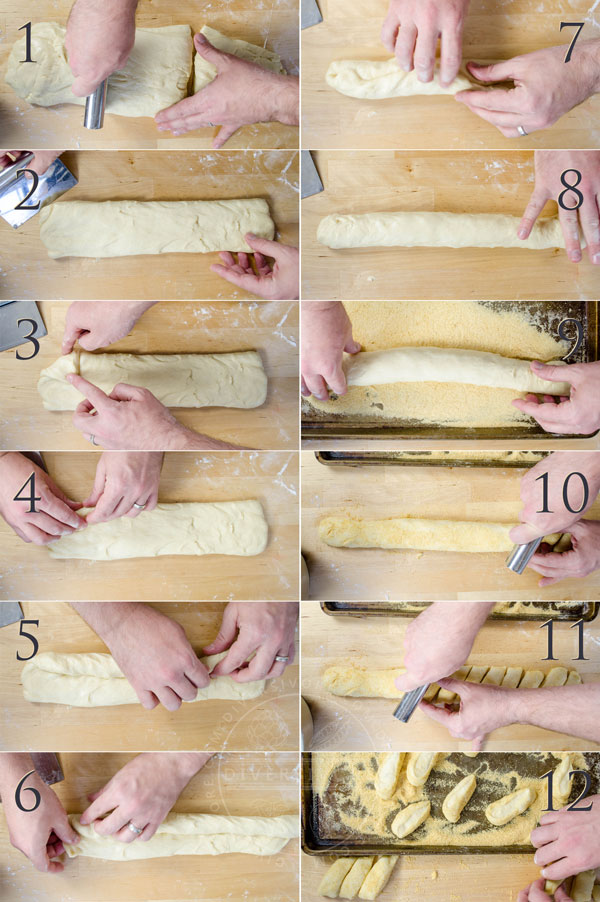
I've broken the basic technique down into 12 steps, which I've illustrated below. A dough knife (bench scraper) makes this process much easier, but you can also use a knife. Try not to handle the cut pieces delicately, as the dough is fairly soft and easy to deform.
Baston Pandesal in 12 Semi-Easy Steps
- Shape the dough into a log and separate it into three pieces.
- Gently flatten one of the three portions into a long rectangle of dough.
- Tuck one corner of the rectangle into the center.
- Begin rolling the folded down edge into the center, following the edge of the folded corner (i.e. work diagonally to sort of 'spiral' the dough into the center).
- Continue along the edge, tucking and spiraling the dough into the middle until you reach the other end.
- Tuck a corner in on the opposite side, then begin rolling the opposite edge over the first edge.
- Roll the opposite edge into the center, tucking it in a bit as you go.
- Once again working at an angle, tuck the new edge into and slightly over the first rolled portion.
- Gently roll and stretch the finished baston to even out the surface and shape.
- Roll the baston in bread crumbs.
- Cut the baston into individual pieces at an angle. Aim for evenly sized pieces that are about 3cm (a little over 1 inch) thick.
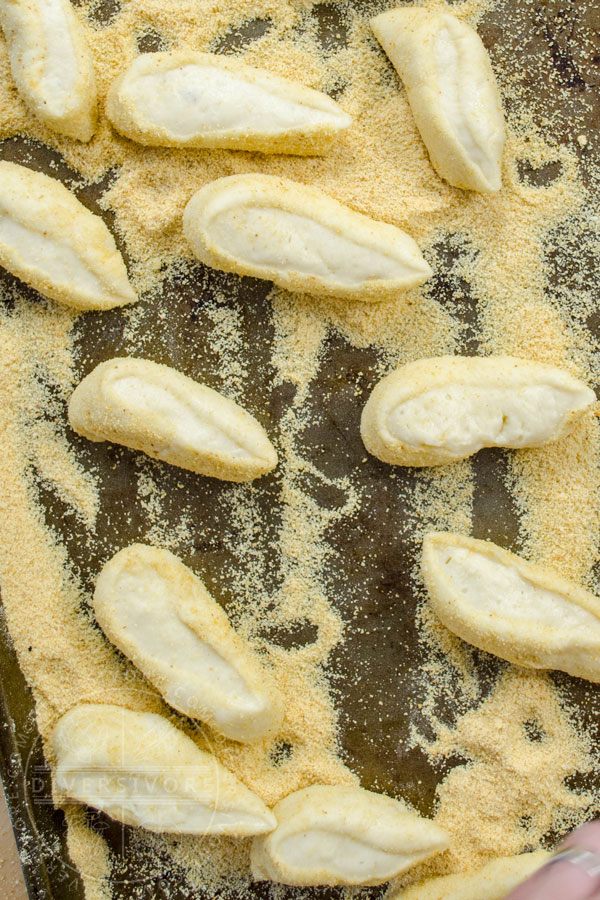
- Gently dip the cut pieces back into the bread crumbs. Arrange the buns on a baking tray and allow them to proof again before baking. Repeat with remaining portions.
Round Buns
Pandesal is easily (and popularly) shaped into simpler, round buns as well. This process requires very little explanation, but I will note two things.
First, if you've got a kitchen scale, it makes it much easier to ensure that you're using equal amounts of dough for each bun. This in turn means that your pandesal will look the same and bake evenly.
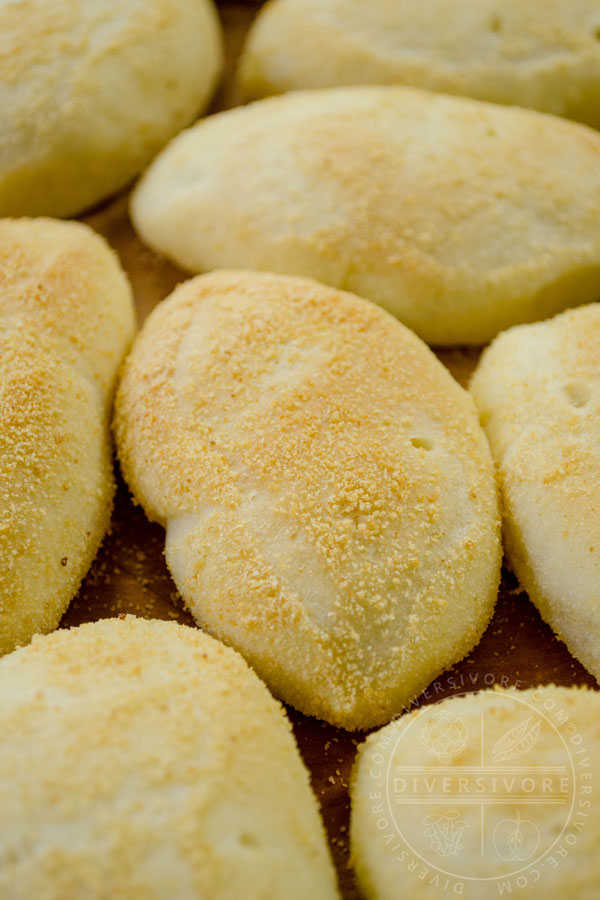
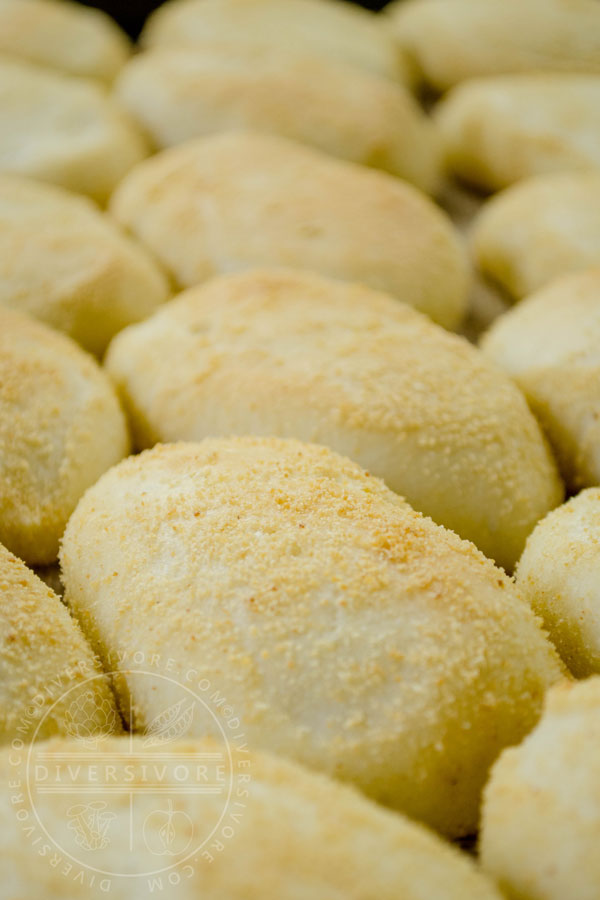
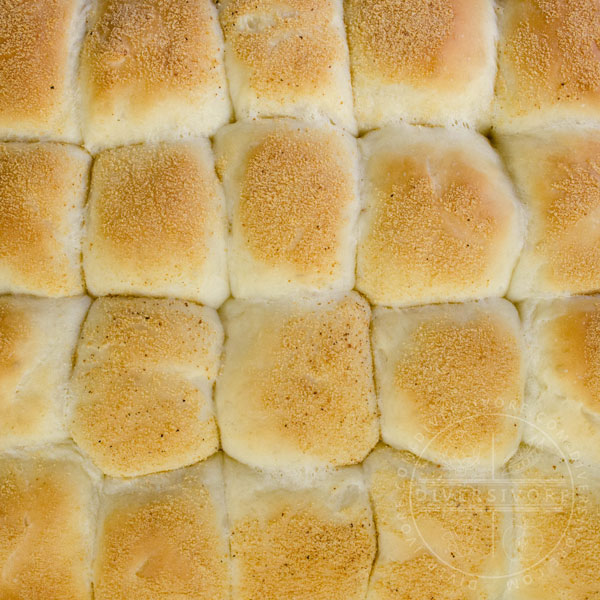
Second, the spacing of the finished buns matters quite a bit. If you space them out widely on the tray, you'll get separate buns that are nicely browned all over. If they're closer together, their edges will meet and you'll get something more like a tray bun with soft bread sides. You can see what I mean in the image below (along with a baston-cut example). Keep in mind that they're going to expand during the second proofing stage, so they're going to end up closer together than they started out!
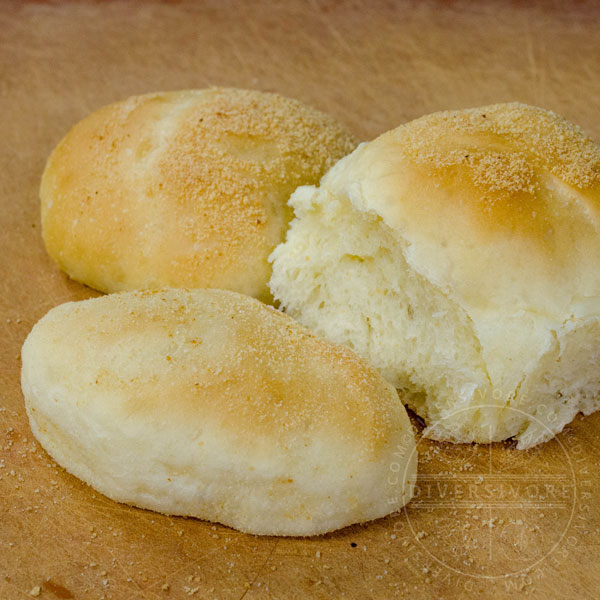
Baston-cut (front), round (back left), and tray-bun style (right) pandesal.
Breadcrumbs
I could have included this section above in the ingredient notes, but most of the notes are concern how to apply the bread crumbs, so I figured I'd address them here with the other techniques.
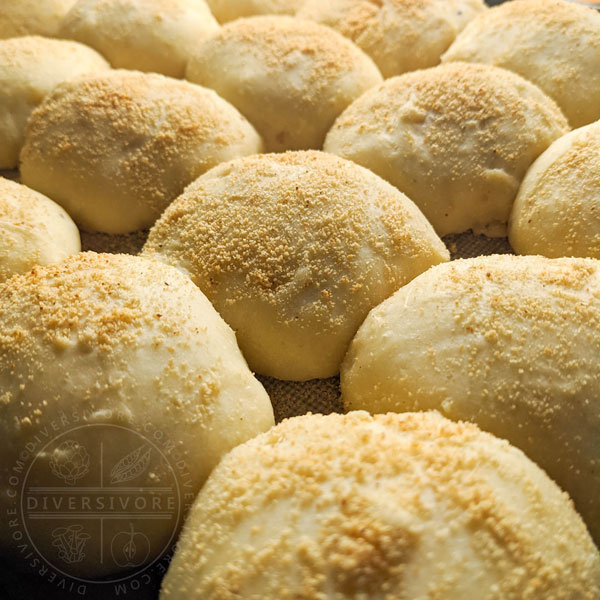
I think pandesal works (and looks) best with fine, lightly toasted bread crumbs. You can buy fine breadcrumbs, or make your own. I toast leftover bread in a low oven until it's very hard and dry, then pulverize it in a food processor and spice grinder (the latter helps to break down bigger, stubborn chunks). I made so much pandesal while developing this recipe that I actually turned some of the unattractive first batches into breadcrumbs, and they were fantastic. Something to keep in mind in case your first efforts aren't quite where you want them to be.
How you use the breadcrumbs will depend on personal preferences; there's no single 'correct' way to use them. If you're making elongated buns, the typical method involves rolling the bastones in the crumbs, then dipping the cut edges back in crumbs once more (see the image below and the 12-step process above). If you're making round buns, you can roll them in crumbs to cover all of the sides, or simply dip the tops to coat them. You can also sprinkle breadcrumbs over the tops of the buns once they're on the trays. As you might expect, the only major difference between methods is how 'crumby' the outside of your finished pandesal ends up, so go with your personal preferences.
As with so many recipes that call for breadcrumbs, it's hard to say exactly how much you'll need. I've specified a cup in the recipe itself, but that relatively large amount is meant to make it easy to roll and cover the dough. You won't actually end up using the whole cup. If you're low on bread crumbs, try the dipping or sprinkling methods.
Oven Humidity
This is something of an advanced trouble-shooting note, but it's one that can make a big difference depending on the season and/or where you are in the world. Humidity can play a big role in how breads turn out. If you want to get into the complexities of this subject, I'd suggest checking out this pair of articles from King Arthur Flour (one & two), but it's worth noting that steam in the oven helps slow down the cooking process, yielding softer, more even bread with a crisp crust. This is why professional bakers use steam ovens! The Philippines is a pretty humid place, but even still, the inside of an oven can get pretty dry. If you're in an even dryer part of the world, you might find it that much more difficult to get light, airy, evenly browned pandesal.
I do a couple of things to help humidify my oven when I bake breads. First (and easiest), I put a couple of small, shallow pans of very hot water in the oven while it preheats. The second trick requires having a large pizza/baking stone. I preheat one of these at the bottom of the oven, then spray it with hot water from a turkey baster immediately after putting the bread in. Pizza/baking stones also helps to trap and even out the heat in an oven, which is a lovely added bonus.
Baking Time & Temperature
The baking times given in this recipe are a suggested starting point. Different ovens can operate at different actual temperatures, or be internally uneven. Even if you know your oven well, there are a number of factors that can impact baking time, including the material/colour of your baking trays, the spacing of the buns on the tray, and the crowding in the oven (i.e. the number of trays you're baking at once). Even factors like elevation and humidity (see above) can impact baking time.
With all this in mind, the best thing you can do is keep a close eye on the pandesal as it bakes. You're aiming for a nice, lightly browned exterior, but you want to avoid letting the tops get too dark. I tested my oven at three temperatures and found that I got the best balance between crust and soft interior when I baked at 325°F (163°C) for about 20 minutes. That being said, this was the case for spaced out, smaller pandesal. Larger, round buns needed another minute or two, while closely spaced buns (tray-bun style) needed a full 5 minutes more. Depending on your personal tastes and your oven, you may find that you need to adjust the temperature up or down, or change the baking time a bit.
In order to get the most consistent results, try to keep your oven door closed as much as possible, and be sure to let your oven preheat fully and even out before you start baking. Try to center your pandesal in the oven as much as possible (though this is admittedly trickier if you bake two sheets at once). If you have a pizza stone or baking stone, use it to even out and trap the heat in your oven (and check out the humidity note above while you're at it).
More? More!
Alright, you made it through! Way to go! You're well on your way to incredible pandesal. If you have any questions that weren't covered in the notes, please feel free to leave a comment below. I'm always happy to help readers figure things out.
If you're looking for more ideas and variations, rest assured that there's a lot you can do! Popular variations include ube (purple yam) and cheese, sweet pandan leaf, healthy and high-protein malunggay (moringa), and more. Pan de coco is a very similar and very popular sweet recipe made with coconut. As I mentioned above, I'm also going to be publishing a related post explaining how to make sourdough pandesal, so stay tuned for that. And, because I'm a sucker for punishment, I might just have to tackle a couple of the fancier, slightly sosyal versions too. What can I say? I'm kind of hooked on making pandesal. I hope you will be too.
Note: Nutritional Information is given for a single bun (1/24th portion of the total recipe).
Nutritional Summary
These are small rolls, so they're not going to make a huge impact on your calorie intake - unless you eat a lot of them. Which would be understandable.
It's white bread, so we're not exactly looking at the most nutrient-dense of foods. But hey, it's bread. Enjoy it.
Malunggay pandesal (made with malunggay/moringa leaves) is a popular, higher protein alternative for those looking to make their pandesal a bit healthier.
Ingredient Pages
No ingredient pages have been written yet for any of the ingredients in this recipe. Like to see one? Let me know in the comments below or by email.
Pantry Pages
No pantry pages have been written yet for any of the ingredients in this recipe. Like to see one? Let me know in the comments below or by email.


Pandesal (Filipino Bread Rolls)
Ingredients
- 1.25 cups milk preferably full-fat
- 1/3 cup granulated sugar
- 2 tsp active dry yeast (see note for instant yeast)
- 4.5 cups all purpose flour plus more as needed
- 1 tsp salt
- 2 tbsp butter softened
- 2 large eggs
- 1 tbsp vegetable oil plus more for oiling the bowl
- 1 cup breadcrumbs fine/dry (see note)
Instructions
Making the Dough
- Warm the milk briefly in a saucepan or microwave. It should be a little warmer than room temperature, but not too hot (hot milk will kill the yeast).
- Mix 1 teaspoon of the sugar into the milk, then sprinkle the yeast over the surface. Allow the yeast to bloom for 10 minutes.
- Crack the eggs into a small bowl, mix with a fork, and set aside.
- Combine the flour, salt, and remaining sugar in a bowl.
- Combine the the proofed yeast/milk, softened butter, eggs, and oil in the bowl of a stand mixer equipped with a dough hook (see note below for hand-kneading instructions).
- With the mixer running at a low speed, add a little of the flour/sugar mixture to the bowl. Repeat until all of the ingredients are combined, scraping down the sides of the bowl as needed.
- Increase speed a bit and mix until dough is well-combined, springy/elastic, and forming a ball around the dough hook (4-5 minutes). If the dough is overly wet and/or won't ball around the dough hook, add flour (a little at a time) and continue to mix until the desired consistency is met.
- Turn the dough out into an oiled bowl, cover with plastic wrap, foil, or a damp cloth, and proof until doubled in size (30-60 minutes, depending on temperature, etc.). The finished dough should spring back nicely when gently poked with a finger.
Forming the Buns
- Gently punch down the dough, then turn it out onto a lightly floured board.
- Form the dough into a rough log shape. Cut this into three equal pieces (a dough knife/bench scraper is easiest for this).
- Option 1 - Cut/oval pandesal - Press 1/3 dough portion into a long rectangle. Form baston (see note) by rolling one corner over, then tucking the edge into the center. Repeat with the other edge. Roll this baston in bread crumbs. Cut the baston at an angle into 3 cm pieces (just over 1 inch). Dip the cut pieces back into breadcrumbs, then space out on a baking sheet covered in parchment paper.
- Option 2 - Round pandesal - Form the dough into one or more long cylinders. Cut small, even pieces of dough from the main portion, then shape these into balls. Roll or dip the balls in breadcrumbs, then arrange them on a baking tray. Space out for crusty rolls, or crowd together for tray-bun style pandesal.Note: A small kitchen scale makes this method much easier and more consistent. Aim for 40 g for smaller rolls, 50 g for larger rolls.
- Cover and proof again until the rolls have risen by about 50% (generally 30-40 minutes).
Baking
- Preheat oven to 325°F (160°C). Optionally, place a couple of small, shallow pans of hot water in the oven to increase the humidity.
- Bake for 20-25 minutes, or until lightly golden. Smaller, evenly spaced rolls will take less time than larger and/or closely spaced (tray-bun style) rolls.
- Remove from oven and cool. If you've made tray bun-style pandesal, I strongly recommend turning them out onto a wire rack to cool, as they tend to get soft/soggy sitting on the pan.
Notes
Nutrition
More Pandesal Goodness!
Sourdough Pandesal (Coming Soon!)
Share this Recipe
Comments
Wow. Now that’s a bread post!! It’s true though, what works for one person sometimes doesn’t work for another. I appreciate all the yeast and flour options and step by step instructions of the techniques used in making pandesal.
Can I use my bread machine for this recipe, kindly reply
I haven’t tested it with a bread machine, but I think you should be able to adapt it to the mixing stages, but not to any of the baking stages. You’ll still need to hand-form the rolls and bake them separately, at which point the bread machine might be more work than anything. Good luck!
Omg, these were out of this world, sooo good!!
I’ve made other similar buns in the past, but not like these. I couldn’t resist sneaking one shortly after they came out of the oven, it took all my will power to just let them cool down for later and not finish the whole tray right then and there! It always reminds of me of my mom when I was young and she would catch us trying to snatch some of her fresh bread, then smack, right in the noggin.
What a keeper!And mind blowingly delicious!!
Thanks for sharing!!😋😋😋
Holy mackerel this post is filled to the brim with info! They look like perfect little buns for sandwiches or as a snack. I’ll be watching for the sourdough version too!!
So interesting, I’ve never heard of pandesal before! I like the crispy exterior with soft interior and that the ingredients are so easy to find. Thanks Sean!
Wow! This is really amazing recipe. This is far the best pandesal recipe! I tried it and the texture is perfect.
What an awesome and informative post. I’m definitely going to make these, they look like perfect sandwich bun or maybe I’ll just slather it in butter.
I don’t blame you for being exhausted! This post is extremely detailed and informative, and I appreciate the ingredient information. I now know so much more about the different types of flour used in various parts of the world. So thank you for that, and the pandesal looks perfect.
Wow – I can see the work that went into this recipe and post – I’d be exhausted too! But great work because, although my bread making experience is pretty limited to Ukrainian Easter bread and my bread machine, I feel I could actually make this. I feel intrigued by it, inspired and maybe a little scared, but your detailed instructions are AMAZING!
Whoa, please do an ube version! Lots of useful information in this post. I didn’t realise that different countries use different flour for “all purpose flour”. Cling wrap is my go-to to cover my breads too. Maybe a word of caution is to check the KitchenAid mixer manual. For the Pro 600, it recommends to not going higher than 2 for kneading doughs.
The easier and fewer the ingredients, the most difficult recipes. You made a fantastic job making and shaping this Filipino bread. That crumb looks amazing!
I’ve been searching for the best pandesal recipe. I grew up in the Philippines and I know my pandesal. It’s just unfortunate that I never learned to make this because it is available everywhere. Anyways, my issue is, I’m looking for that recipe that makes the pandesal airy. Almost nothing inside. All recipes I’ve tried, though soft and taste the same as pandesal in the Philippines, are just too dense for my taste.
I also found out that they are using flour that is called “tercera.” It’s not a brand, but it’s a classification meaning 3rd class flour, it has lowest protein content, like pastry flour, which makes the final result product softer than higher protein flours.
I have tried almost all the combination of different flour types and solid to liquid ratios, 5:3 is the best. And still could not get the texture I want. I’m tempted to go visit back to Philippines and pay a panadero to show me the recipe and procedures on how to make the pandesal I want but I cannot do that yet because of this pandemic. The only thing that I havent tried yet is to incomporate kilikili pawis when kneading the dough. Thanks for this article!
Whats the measurements of flour and milk
I dont get the 4.5 flour
Hi Yuuna. It’d 4.5 cups of flour, or 540 grams. The milk is 1.25 cups, or 300 ml. It seems that perhaps the word “cups” didn’t show for you, though I’m not sure why, as it shows up on my end. In any case, if you have any trouble, you can always click the “Metric” button in blue below the ingredient list. Hope that helps! Cheers!
Thank you for the recipe and all the notes. I am of Filipino heritage and have used your recipe and notes with my sourdough starter to develop an incredible version at home. We no longer have to go to our Filipino bakery!
If I were to add malunggay, what would be the measurements… how much do I add?
If you’re using fresh malunggay (moringa), I would start with about 3/4 cup, chopped, stems removed. I think 1 cup would actually be a bit more of a ‘standard’ quantity, but I generally encourage people to try a variation like this with a little bit less to see if it suits their personal tastes. That being said, if you already know and love malunggay pandesal, 1 cup is probably a good choice too.
Dried malunggay has lost about 3/4 of its weight in water, making for a more concentrated flavour. Consequently, I’d recommend using 3-4 tablespoons. Hope that helps – love to hear how it goes!
Holy mackerel!!! This recipe is so good. Tried a few but nothing compares to this.
Thank you! I’m delighted to hear that!
Thank you for sharing, I will definitely make this recipe. 🥰❤️